Apple
Apple setup
Configuring Apple as a Social Provider
In this section, we will show you how to provide Apple as an option on your cidaas login page. After configuring Apple as a social provider in cidaas, you will get a new option called
- Login with Apple on the login page.
- Sign up with Apple on the registration page.
On your login page.

Prerequisites
Before you begin, ensure you have:
- Active Apple Developer Program membership ($99/year)
- Domain ownership verification for your website
- Administrative access to cidaas portal
- Basic knowledge of JWT tokens and cryptographic keys
Overview
The overall process consists of 5 main steps:
- Prerequisites check: Verify Apple Developer Program membership
- On cidaas admin portal: Get Redirect URL for Apple
- On Apple developer console: Create App ID with Sign in with Apple capability
- On Apple developer console: Create Services ID and configure domains
- On Apple developer console: Create Key ID and generate client secret
- On cidaas admin portal: Configure Apple provider with credentials
We'll guide you through each step — it's straightforward when done in the right order.
Apple Developer Setup
Step 1: Get Redirect URL from cidaas
In this section, you'll get the Apple Redirect URL from cidaas admin portal, which you'll need for Apple configuration.
-
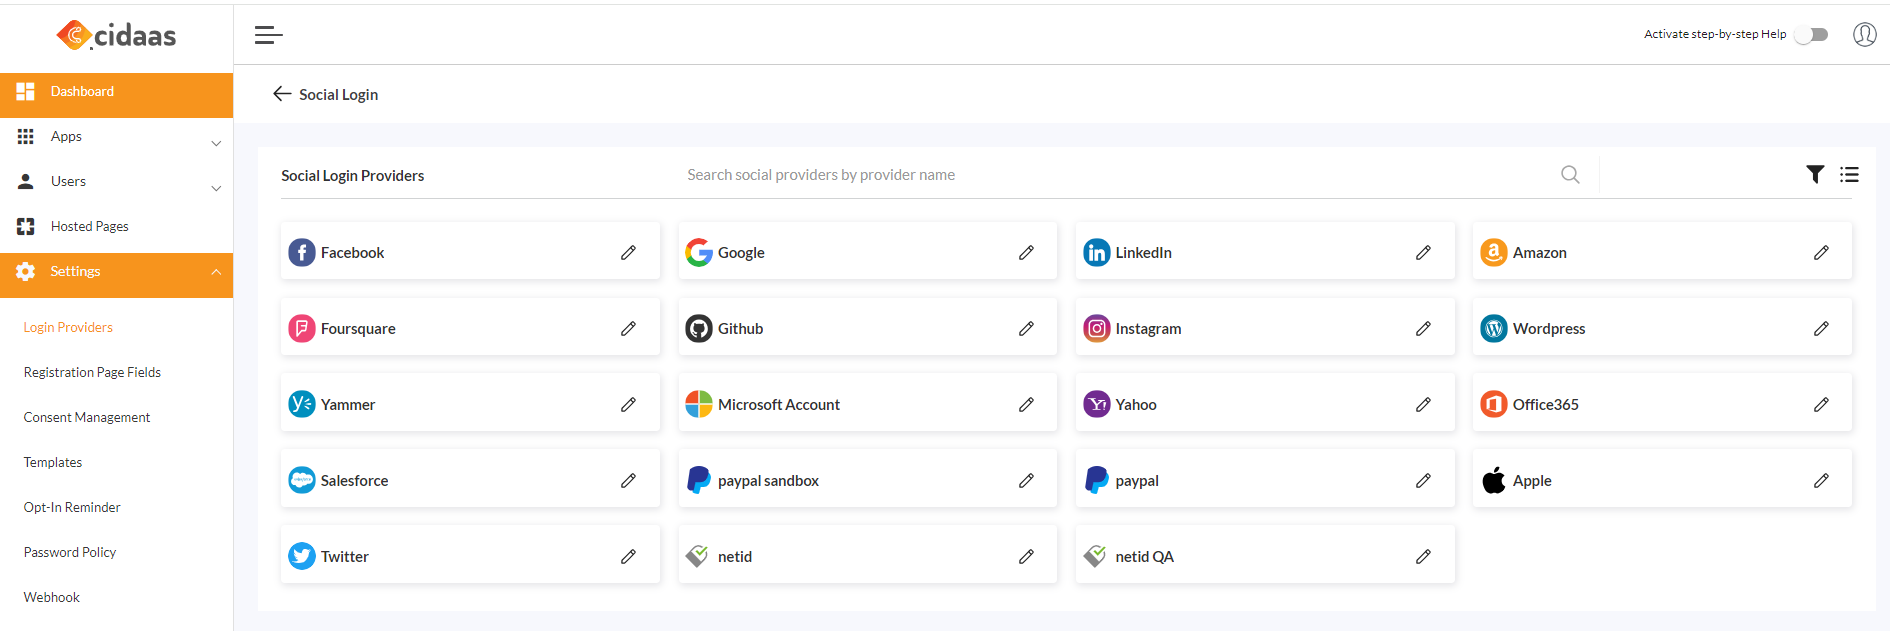
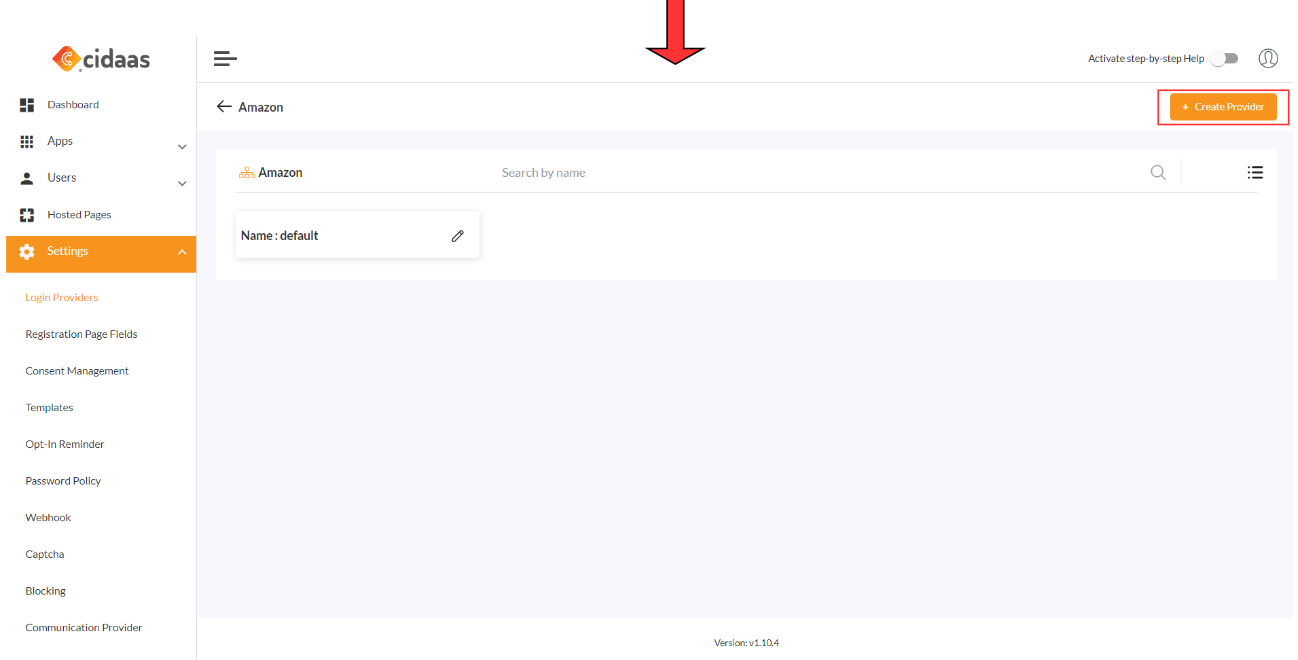
Log in to the cidaas Admin portal. Navigate to cidaas Admin dashboard → Settings → Login Providers → Social Providers, select Apple from the menu and click on Create provider.
-
Scroll down to the section "Configuration Steps for Apple," which will show Redirect_URL. Copy and save this URL - you'll need it in Step 4.

Step 2: Create an App ID
In this section, you will create an Apple App ID on the Apple developer portal.
-
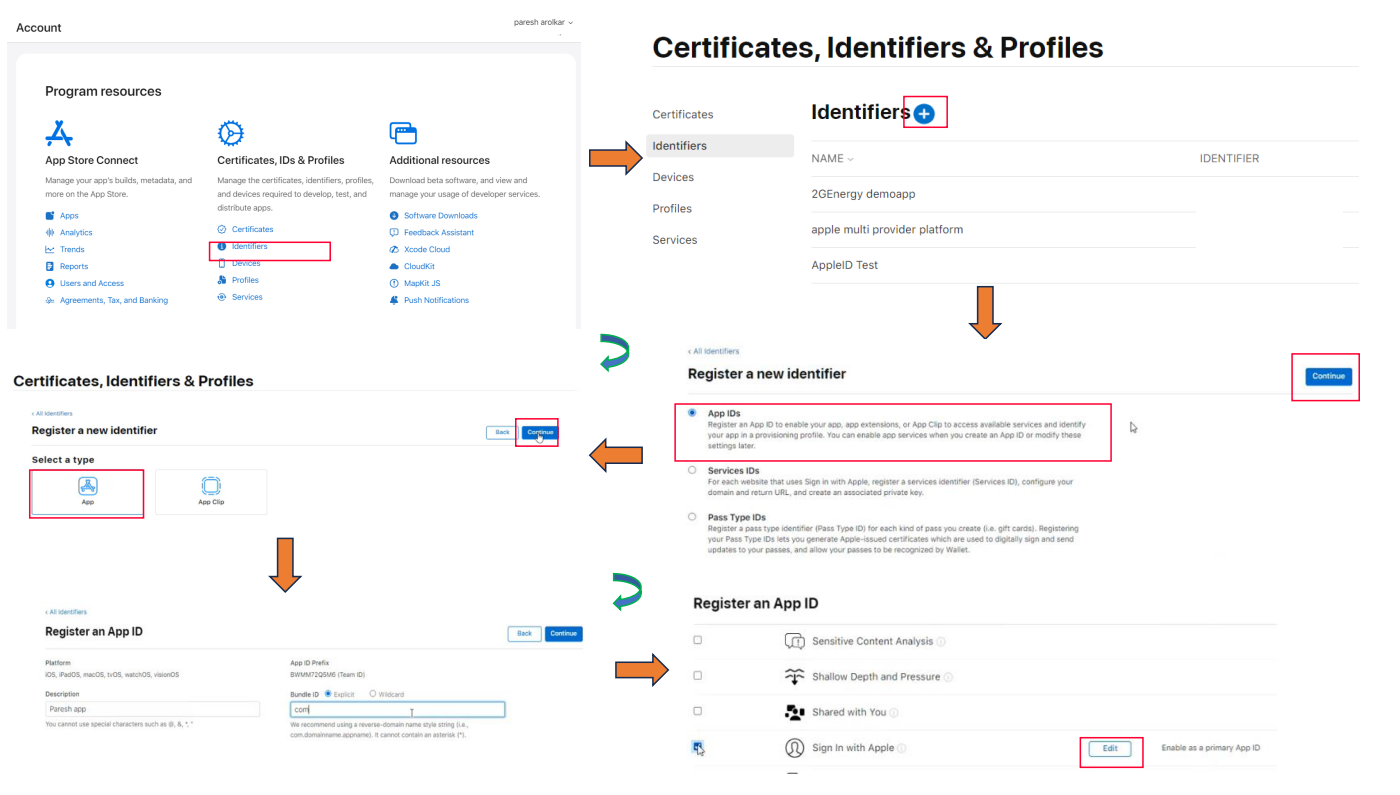
Log in to your Apple Developer Portal and click on Certificates, IDs, & Profiles.
-
Select Identifiers, and from the right drop-down, select App IDs and then click the blue plus icon.
-
Select App IDs → Continue, and then select the App type and click on Continue.
-
Add the description and bundle ID as recommended by Apple.
-
🚨 Critical Step: In the Capabilities section, scroll down to Sign in with Apple and check the box to enable it.
warning
:::> Important: You must enable "Sign in with Apple" capability during App ID creation. If you skip this step, you will see "No App ID is available" when creating the Services ID later.
-
Click on Edit next to "Sign in with Apple" to configure additional settings.
-
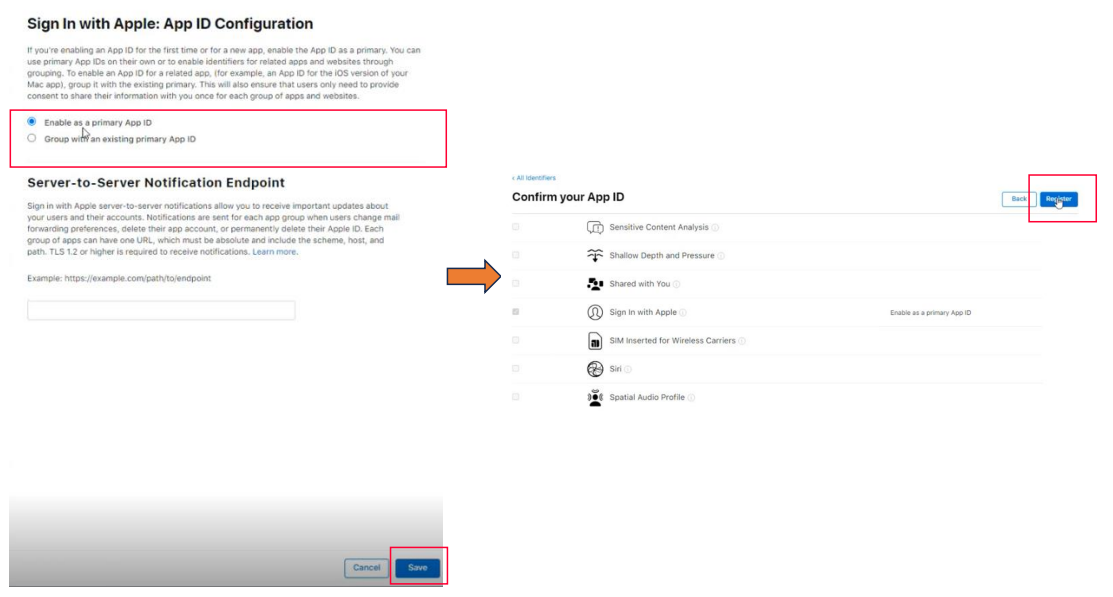
Select Enable as a primary App ID → click Continue → Register.
-
Your App ID is ready. Note down the App ID for the next step.
Step 3: Create a Services ID
In this section, you will create an Apple Services ID, which serves as your Client ID.
-
Select Identifiers, and from the right drop-down select Services IDs, and then click the blue plus icon.
-
Select Services IDs → Continue, then add the description and Identifier as recommended by Apple, and click on Register.
-
After creation, click on your Services ID from the list.
-
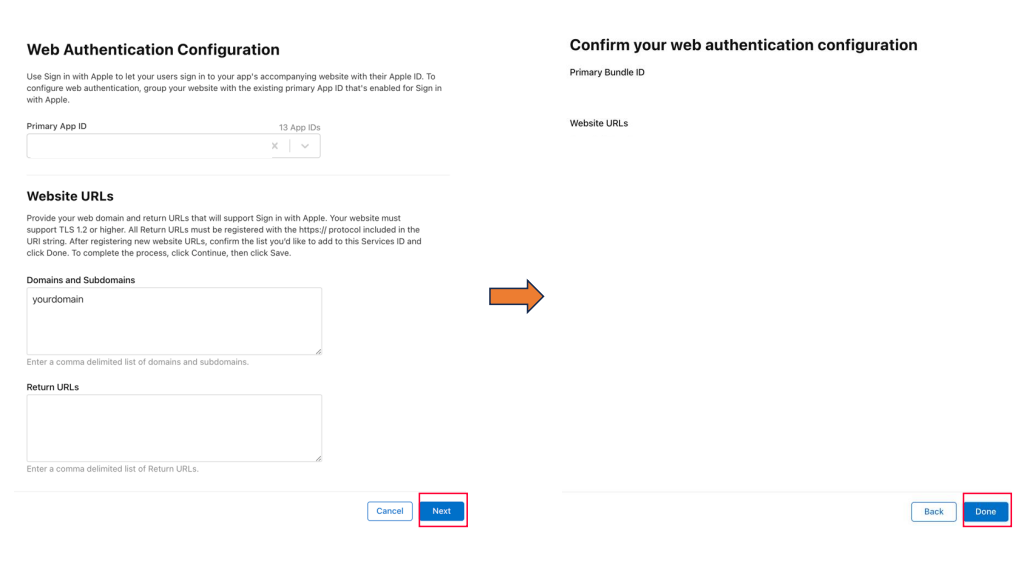
Check the box for Sign in with Apple and click Configure.
-
In the configuration dialog:
- Select your App ID from the dropdown (created in Step 2)
- Enter your Primary App Domain (e.g.,
yourdomain.com) - In Return URLs, paste the Redirect URL you copied from cidaas in Step 1
- Click Save
-
Click Continue → Save to finalize the Services ID.

Step 4: Create a Key ID and Generate Client Secret
In this section, you will create an Apple Key ID and generate the client secret using the private key.
Create the Key ID
-
Select Keys from the left menu, and then click the blue plus icon.
-
Add the key name, then select Sign in with Apple and click Configure.
-
Select your App ID from the dropdown menu, and click Save → Continue → Register.
-
Important: Copy the Key ID and download the
.p8file immediately. -
Note your Team ID (10-character alphanumeric ID visible in your Apple Developer account header).
- The
.p8private key file can only be downloaded once - Keep this file secure and never share it or commit it to version control
- Store it in a secure location with restricted access
Generate Client Secret
You need to generate a JWT token using the downloaded private key. Choose one of the following methods:
Method 1: Python Script
import jwt
import time
from cryptography.hazmat.primitives import serialization

# Configuration - Replace with your actual values
key_file = 'path/to/your/AuthKey_XXXXXXXXXX.p8'  # Path to downloaded .p8 file
team_id = 'YOUR_TEAM_ID'                         # 10-character Team ID
client_id = 'YOUR_SERVICES_ID'                   # Services ID created in Step 3
key_id = 'YOUR_KEY_ID'                           # Key ID from Step 4

# Read the ECDSA key from the file
with open(key_file, 'r') as f:
    ecdsa_key = serialization.load_pem_private_key(
        f.read().encode(),
        password=None
    )

# Define the headers
headers = {
    'kid': key_id
}

# Define the claims
claims = {
    'iss': team_id,
    'iat': int(time.time()),
    'exp': int(time.time()) + 86400 * 180,  # 180 days expiration
    'aud': 'https://appleid.apple.com',
    'sub': client_id,
}

# Generate JWT token
token = jwt.encode(claims, ecdsa_key, algorithm='ES256', headers=headers)

print(f"Client Secret (JWT Token): {token}")
cidaas setup
Configure Apple as social provider setup in cidaas app
In this section, you'll find steps on
- How to add the client ID and client secret that you obtained from the Apple Developer Portal into your cidaas application and,
- how to select client applications for which you want to enable Apple as a social provider.
-
Now, navigate to cidaas Admin dashboard -> Settings -> Login Providers -> Social Providers.
-
Click on Apple > Create providers, enter the required details, and save.
- Enter the Client ID (service ID) and Client Secret acquired from the Apple setup section.
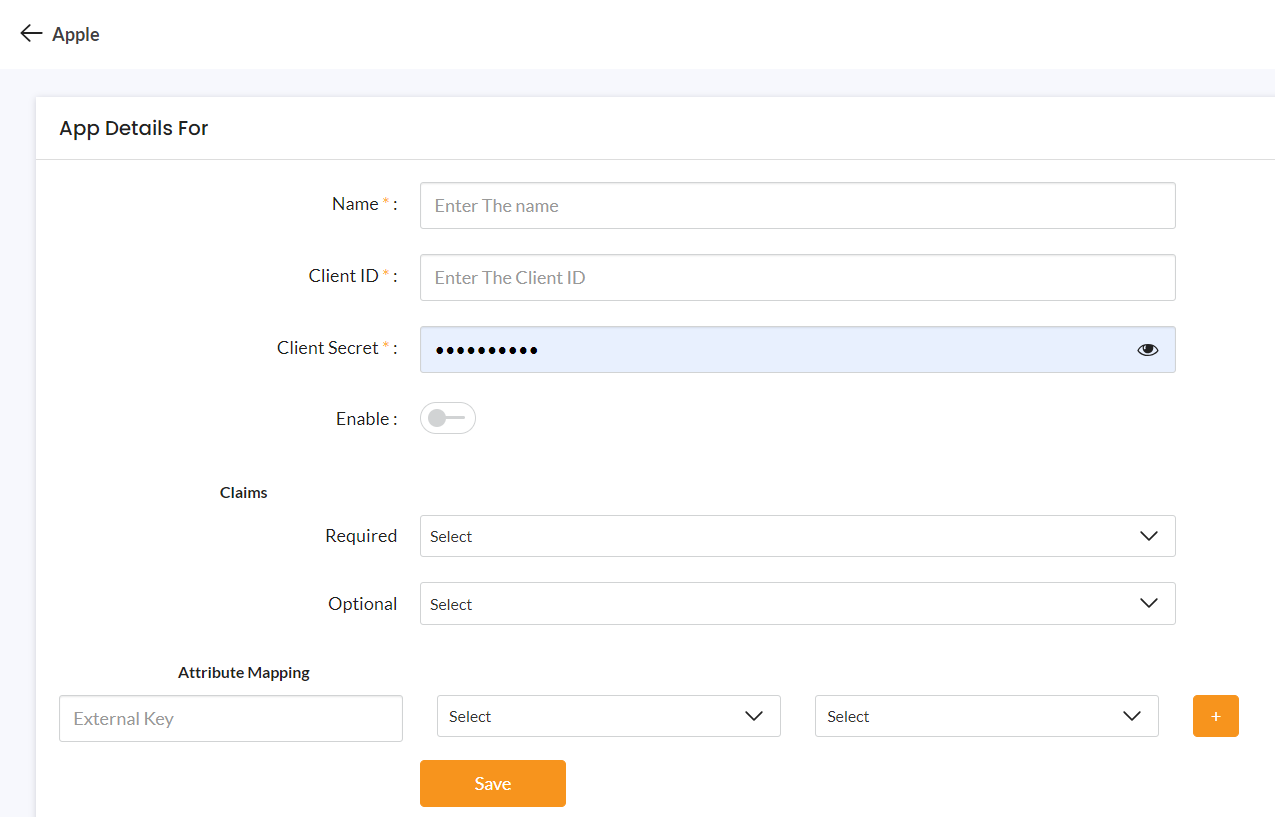
-
After you save, you can select the application that you want Apple to use as a social provider.

-
Apple is available as a social provider for your application.
Note : An administrator can configure single provider to more than one client
Reference Link how to configure other providers?
Please contact us on our Developer Support Page.