
Domain-based or User-based Redirection (Webfinger)
The domain or userbased redirection is helpful when a user wants to bring their own identity by using another identity provider.
cidaas facilitates by the webfinger feature to instantly redirect the user to their preferred or intended identity provider.
The domainbased redirection is also known as Webfinger.
Why do we need Domain-based or User-based Redirection (Webfinger)?
In a B2B environment, the stakeholders mostly want a familiar identity provider. Keeping that in mind, cidaas now supports multiple custom identity providers (IDPs) compliant with OIDC and OAuth2 standards. This enables users to choose their company's IDP for login, using familiar credentials or enabling automatic Single Sign-On (SSO).
Now take a look at the diagram below.

-
Company A, leveraging providers A and B within the @astra.ch domain, integrates their application and providers into the cidaas. Subsequently, when user (Anton) initiates the login process with their respective provider, the cidaas webfinger action facilitates the presentation of provider options (A and B) to the user, enabling a secure authentication experience whereby they can seamlessly and securely log in to their preferred provider using cidaas authentication mechanisms.
-
Company B, with a singular provider C operating within the @bella.in domain, registers their application and associated provider in the cidaas. Upon user login with the specified provider, facilitated by the cidaas webfinger action, the customer (Betra) is securely redirected to the resource login page, ensuring a secure authentication process through cidaas mechanisms.
In this context, we have divided webfinger login into three categories: Domain-based redirection,User-based redirection, No redirection
Motivation for using Domain-based or User-based Redirection:
- The user does not need to provide all their information to sign up for this service, e.g.,
given_name,family_name, etc., because they might be provided directly by the identity provider during the login. This user information will be automatically transferred to cidaas during the first registration and in every login. - Furthermore, when the user is already authenticated and has a valid session with the identity provider, they will instantly be logged in; this is called single sign-on, as the other identity provider issues a code to cidaas, which indicates that the user was successfully logged in.
- You can use your usual account instead of creating a new one. It's more convenient, saves time, for e.g., remembering another password or for account creation and furthermore improves the security.
Technical Integration
What is Domain-based and User-based redirection?
| Redirection Type | Explanation |
|---|---|
| Domain Based Redirection | considers the email address domain entered by the user. Using an identifier first approach allows us to detect if, for this domain, another identity provider is configured. Now, when a user enters such a domain, the user will be redirected to the configured identity provider, independent of whether the user already exists. |
| User based redirection | determines if the user exists already. If the user exists the user can automatically be forwarded to the provider that they were using or the User Interface can highlight and point the user to actively select this provider to authenticate. |
| User and Domain-based webfinger login | If you choose User and Domain-based webfinger login, it considers the domain configured as well as the provider the user has already signed up with. |
When is the user automatically redirected?
The automatic redirection will only work if you are using a user-identifier-first approach. This means that the initial page, if the user is not having an active session, is the page where the user can insert a user identifier, which can be an email, a mobile number, etc.
Now the API included in the user identifier first approach will determine whether the user exists, and depending on the result it will redirect to the registration page or login page.
When using domain or userbased redirection, the API also considers if for a particular provider there is a domain-bound redirection, and if the user exists, it will not forward to the login page, but here the API can decide whether to redirect to the provider the user has used before. If it is a "self" provider, the user is redirected to the usual login page.
| Criteria | Example | Configuration |
|---|---|---|
| App configuration: Identity providers | The OAuth client the user signs in with must allow provider login. | On the application (Integrations → Applications in Trustdesk, or Apps → App Settings in the legacy Admin Dashboard), enable the identity providers this client may use. In the API, this is the login_providers list (legacy) or identity_providers.providers (cidaas 4.x). Only providers enabled for the app can be shown on the login page or returned by the user existence API. If a user already exists with a provider that is not enabled for the app, the API returns action blocked. To allow new users to register through an external provider, also enable Allow registration with social information (register_with_login_information). See App management. |
| App configuration: Webfinger mode | Controls whether domain- or user-based redirection is evaluated. | Set the application-level webfinger value. In cidaas 4.x this lives under identity_providers.webfinger; in legacy app settings it is the root-level webfinger field. Allowed values: no_redirection, domain_based_redirection, and user_and_domain_based_redirection. Your identifier-first login UI passes the same value in the user existence API request body. Default: no_redirection. |
| Identity provider configuration: Email domains | Maps an email domain to a specific provider for domain-based redirection. | On each identity provider (Providers → Identity Providers), configure the domains list with email domains (for example astra.ch, bella.in). When a user enters an email address whose domain matches, domain-based redirection can route them to that provider. Applies to custom OAuth/OIDC, SAML service provider, and Active Directory providers. See Identity provider setup. |
Understanding the Flow and APIs
The concept of the domain/userbased redirection is based on a user-existence API. This API returns what action the UI should follow.
The user existence API returns a response body containing action and a URL that can be used for redirection. The advantage of this concept is that it is still up to the User Interface if it only wants to highlight the provider, if it provides the user with the information that there is a suggested provider to use for him, or even automatically redirects.
| API | Description | Link |
|---|---|---|
| Webfinger | This API facilitates webfinger redirection for the mapped customer identity provider and cidaas app. i.e., domain and user-based redirection | POST /useractions-srv/userexistence/:requestId |
| Initiate provider login/register | This API endpoint helps to initiate the login or registration process. | GET /login-srv/social/login/:provider_name/:requestId |
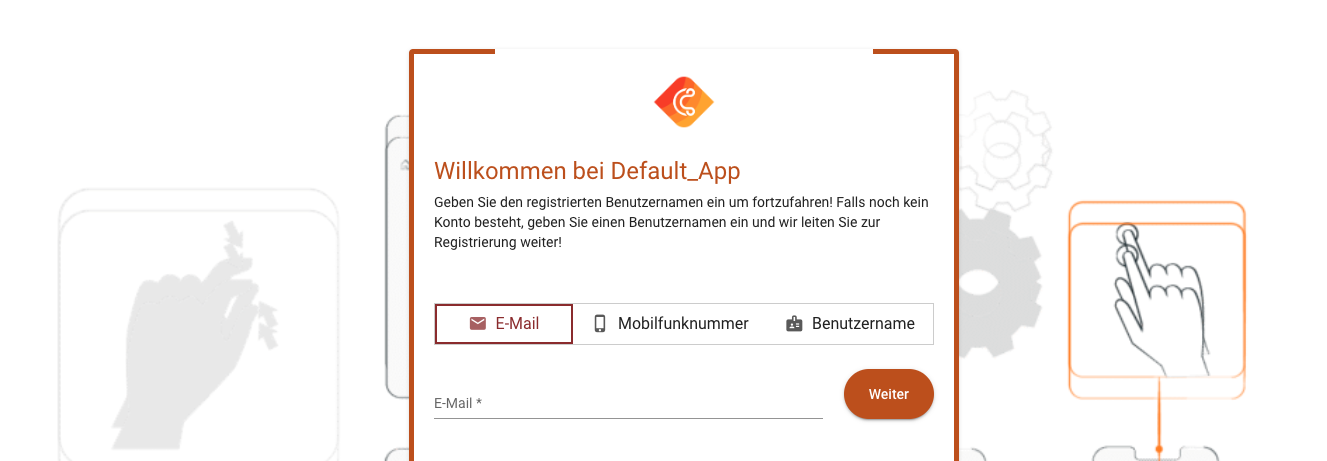
Step 1: Entering the User Identifier
The first step is only UI related. Therefore, users must be able to enter their identifiers. For domainbased redirection, only the domain of their email address can be used. If you also allow mobile numbers and usernames, this does not allow a domainbased redirection.
The user interface presents a field to enter the user identifier.
Step 2: Identify User Existence and Provider Redirection
To identify if the user exists and a provider redirection is supposed to happen, the webfinger API is used.
The API is called userexistence:
curl --request POST \
  --url https://domain/useractions-srv/userexistence/095e658-a070-478e-a219-3843 \
  --header 'Accept: application/json' \
  --header 'Content-Type: application/json' \
  --data '{
  "webfinger": "no_redirection  or domain_based_redirection or user_domain_based_redirection", //contains the action which should be considered
  "rememberMe": true, //if the user selected rememberMe this can be provided, and will be attached as query parameter to the redirect URI
  "email": "[email protected]" //the identifier
}'
The response contains an action, this can be login, select, redirect or register.
login: The login action will be presented if the user exists with a self provider. Thereby, the user interface can prompt the user for authentication using any configured method.register: The register action should be interpreted from the UI to prompt the user for registration. This happens if the domain does not match any provider configuration and if the user does not exist.redirect: The redirect action implies redirecting the user. This happens if the domain matches a provider configuration or if the user already exists with a provider.select: If the user exists with multiple providers, then a select action will be returned. The provider response attribute contains multiple entries from which the user can select the preferred one.
{
  "success": true,
  "status": "200",
  "data": {
    "action": "redirect",
    "providers": [
      {
        "redirectUri": "https://domain.eu/login-srv/social/login/facebook/1232-12312-1231223?rememberMe=true",
        "displayName": "facebook",
        "logoUrl":"https://facebook.com/logo.png"
      }
    ]
  }
}
Step 3: Initiate the Provider Login
The provider login is not only a GET call. In the response the providers object allow to call the redirectUri without any logic in the UI.
| providers object | description |
|---|---|
redirectUri | The redirectUri can be used exactly as it is. It is a GET call and redirects the user to the provider authorization request. |
displayName | The displayName will become relevant when the action is select. This displayName allows the user to know which provider is available or them to select. |
logoUrl | The logoUrl will also become relevant when the action is select. Because this logoUrl allows to render the provider nicely by providing a proper, recognizable logo of the provider. |
curl --request GET \
  --url https://demo.cidaas.de/login-srv/social/login/:providername/:requestId \
  --header 'Accept: application/json'
Implementation using SDKs
This Implementation Guide is based on the default hosted pages which is using an Angular framework based on Typescript. It can be implemented in any other programming language as well.
To install the cidaas-sdk please perform following command
npm install cidaas-javascript-sdk
The import to your webapp will be done by using:
this.cidaas_sdk = new WebAuth(options)
Identify User Existence and Provider Redirection
export interface UserCheckAPIRequest {
  requestId: string; //the requestId generated by the authz-API
  username: string; //the unique user idenfier which can be the email, mobile number or username as well as custom usernames
  webfinger: string; //one of 'no_redirection' | 'user_and_domain_based_redirection' | 'domain_based_redirection';
  rememberMe: boolean; //can be selected by the user which will finally set the sso cookie
}

export interface Provider {
  redirectUri: string; //the redirect URI to initiate the authorization request for the provider
  displayName: string; //the displayName if select is returned form the existence API, this is used to render the select page
  logoUrl?: string;//the logoURI if select is returned form the existence API, this is used to render the select page
}

export interface UserCheckResult {
  action: string //  'redirect' | 'login' | 'register' | 'select' | 'blocked';
  providers?: Provider[];
}

 // get user exists - useractions-srv
  getUserExistsInfoFromApi = async (options: UserCheckAPIRequest): Promise<ResponseBody<UserCheckResult>> => {
    return await this.cidaas_sdk.userCheckExistsByRequestId(options);
  }
Please connect with our support team.