Microsoft EntraID
Configuring Microsoft EntraID as an OpenID Connect
In this section, we will show you how to provide Microsoft EntraID as an option on your cidaas login page. After configuring Microsoft EntraID as a Open ID in cidaas, you will get a new option called
- Microsoft EntraID on the login page.
- Microsoft EntraID on the registration page.
Request permissions that require admin approval
Learn how to handle permissions and request admin consent for application permissions in your code.
On your login page.

The overall process in a nutshell, would be:
- On the Microsoft EntraID console: Register Application to get client id, secret and endpoints.
- On the cidaas admin portal: Add the Microsoft EntraID client id, client secret, and endpoints in cidaas application and select the appropriate cidaas applications for which you want to enable Microsoft EntraID.
- On the cidaas admin portal: Select Microsoft EntraID as a custom provider.
We'll guide you through the process steps — it's pretty easy.
-
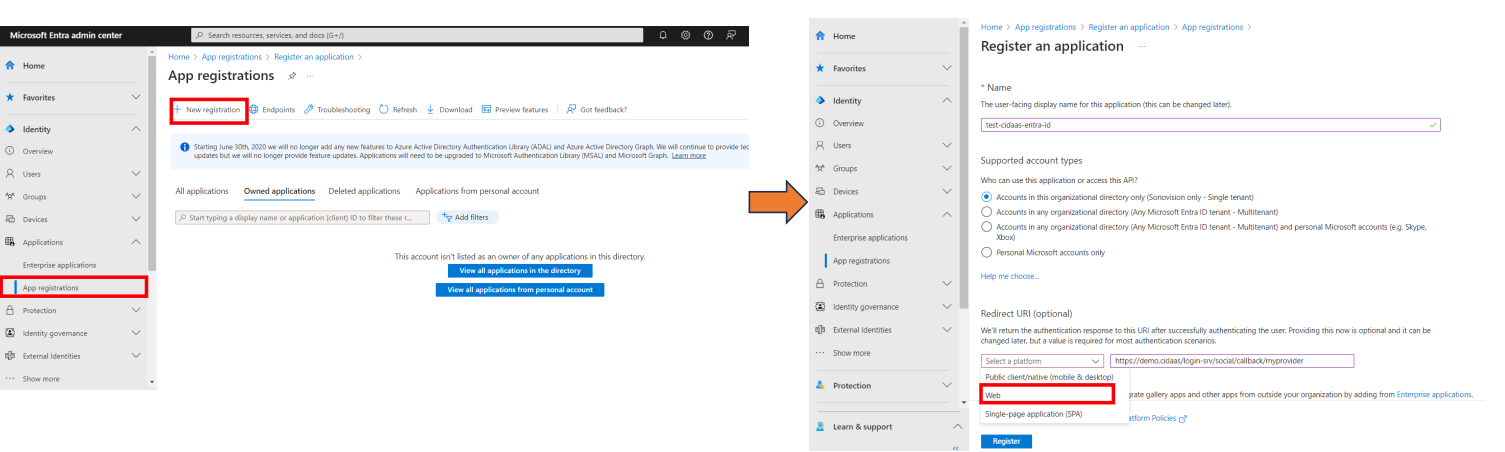
Login to your Microsoft admin console and click on the App registration.
-
Select New Registration > Enter the details and click on Register.
Note: The provider name in the Redirect url must match the Provider Name you set on your custom OAuth and OpenID connect. Eg: Here it is myprovider.
-
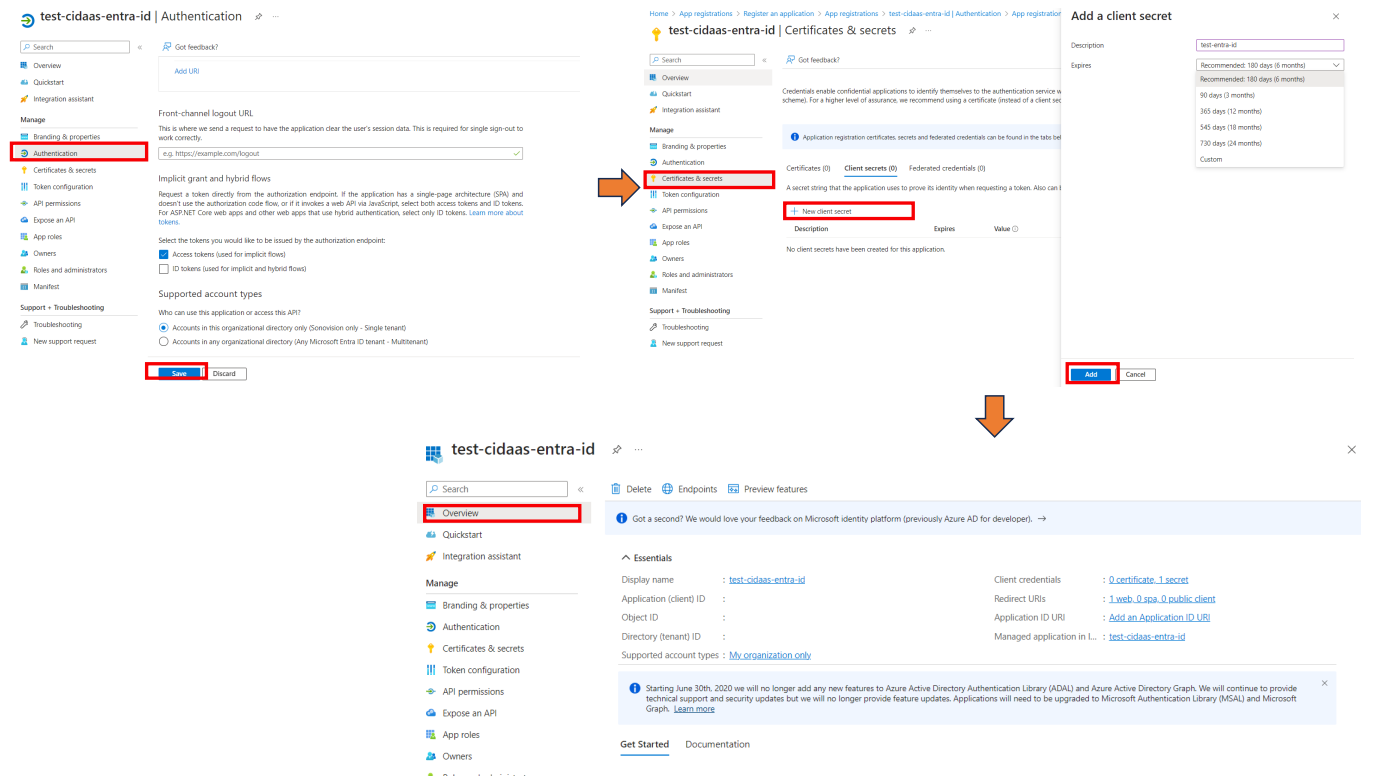
(obsolete in new entraID setup) Click on Authentication, and under Implicit grant and hybrid flows select Access Tokens option and click on the save button.
-
Click on Certificates and Secrets > *New client Secret >Add the desired name and time duration, and click on the Add button.
-
Navigate to the overview and copy the client ID and secret.
-
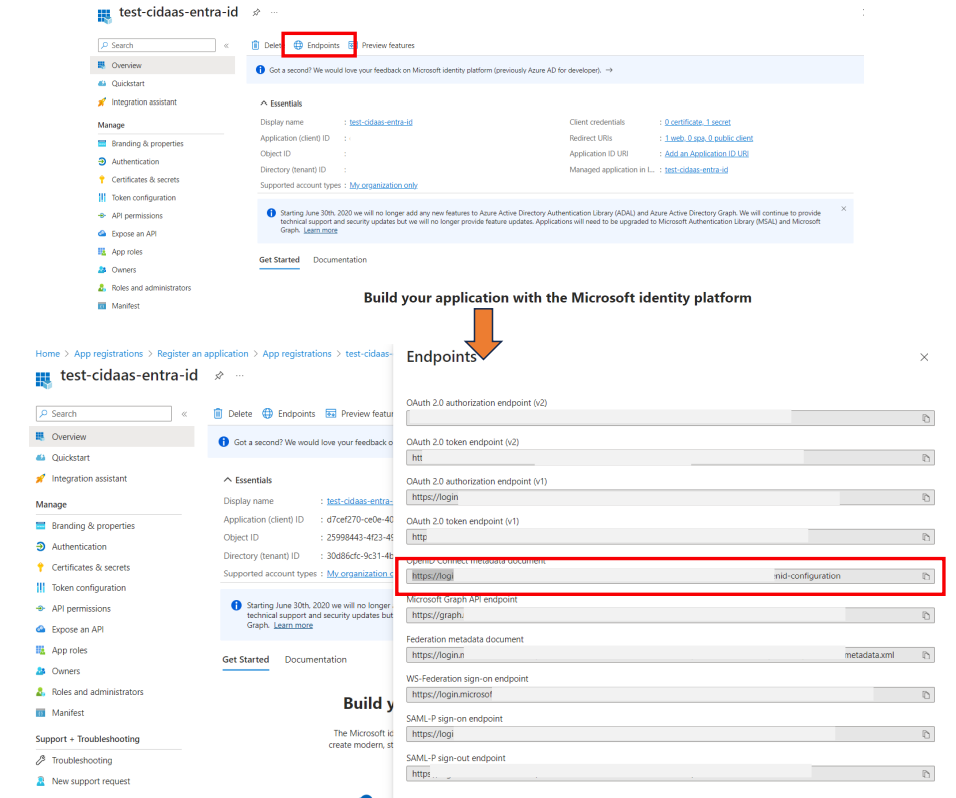
Click on the Endpoints and copy the OpenId Connect metadata document endpoint.
-
Let's move to the cidaas setup section above.
-
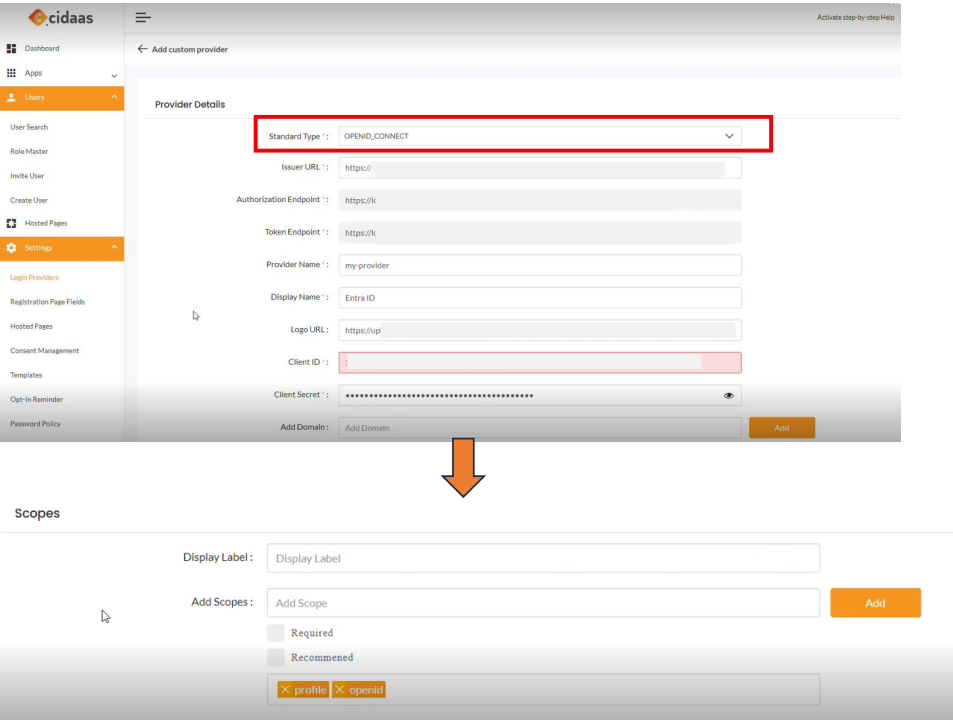
Now, navigate to the cidaas Admin dashboard -> Settings -> Login Providers -> Custom OAuth2.0 and OpenID Connect > Add New Provider.
-
Select the OPENID_CONNECT from the standard type.
-
Enter the details acquired from the Microsoft EntraID section.
Note: The provider name in the Redirect url must match the Provider Name you set on your custom OAuth and OpenID connect. Eg: Here it is myprovider.
-
Add the scopes profile, openid, enter the userinfo, and save.
-
After you save, you can select the application you want Microsoft EntraID to use as an OpenID provider.

Now you have enabled the Microsoft EntraID as custom login provider.
-
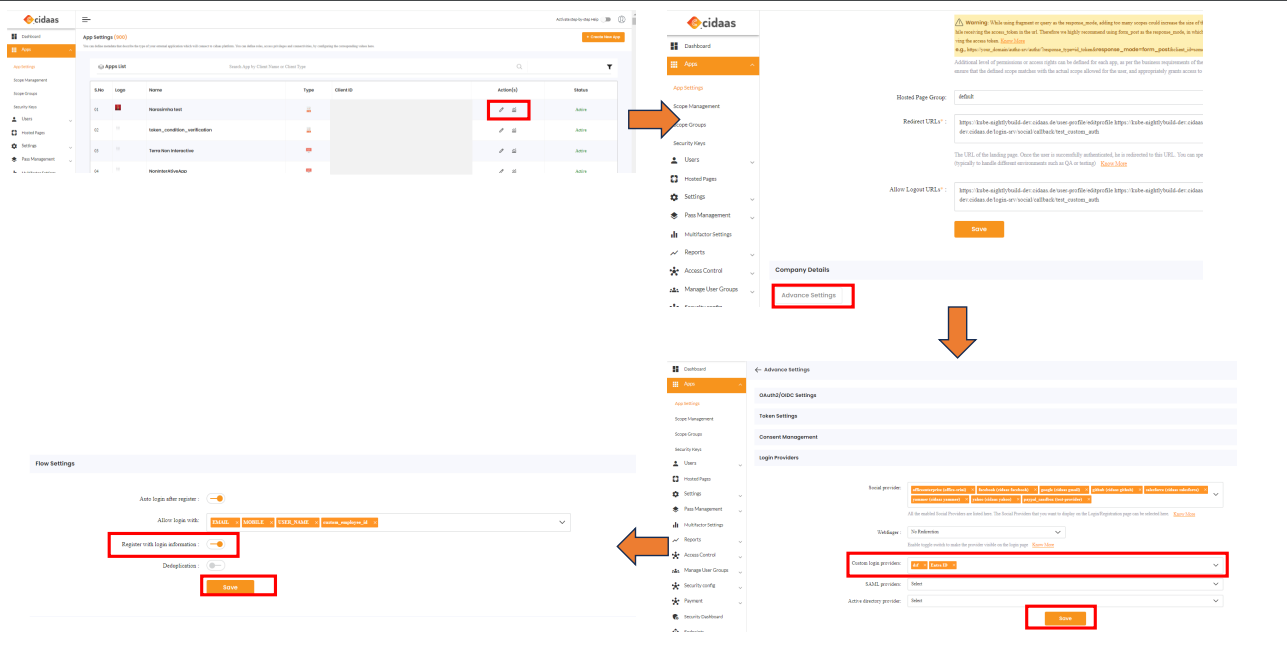
Go to Apps >App Settings > Navigate to your app > Click on the Edit icon.
-
Scroll down to the Advance settings > Login providers, Under custom login providers, enter the EntraID and save.
-
Under Flow Settings enable Register with Login Information.
-
Microsoft EntraID is available as a OpenID provider for your application.
Note: Administrator can configure a single provider to more than one client
Reference Link how to configure other provider?
Please contact us on our Developer Support Page.