Progressive Registration
cidaas lets you get data from your customers each time they interact with your product instead of requesting their profile information all at once during registration.
This technique is known as Progressive Registration or Progressive Profiling.
What are fields?
Fields are user attributes. A claim can be the given_name, family_name as well as birthdate and many more.
The OpenId Connect (OIDC) specification defines a set of standard Claims. They can be requested to be returned either in the UserInfo Response or in the ID Token.
You collect user information during registration and as soon as you require more user information. Thereby you are also increasing user trust, and achieve a collection of user information based on your purpose.
When is a user asked for user information?
Depending on the app settings you can control, which information the user is required to provide when using this particular client.
| Criteria | Example | Configuration |
|---|---|---|
| Required Fields | These fields are mandatory. In case the user has not provided this information yet, they will be prompted to complete progressive profiling. | 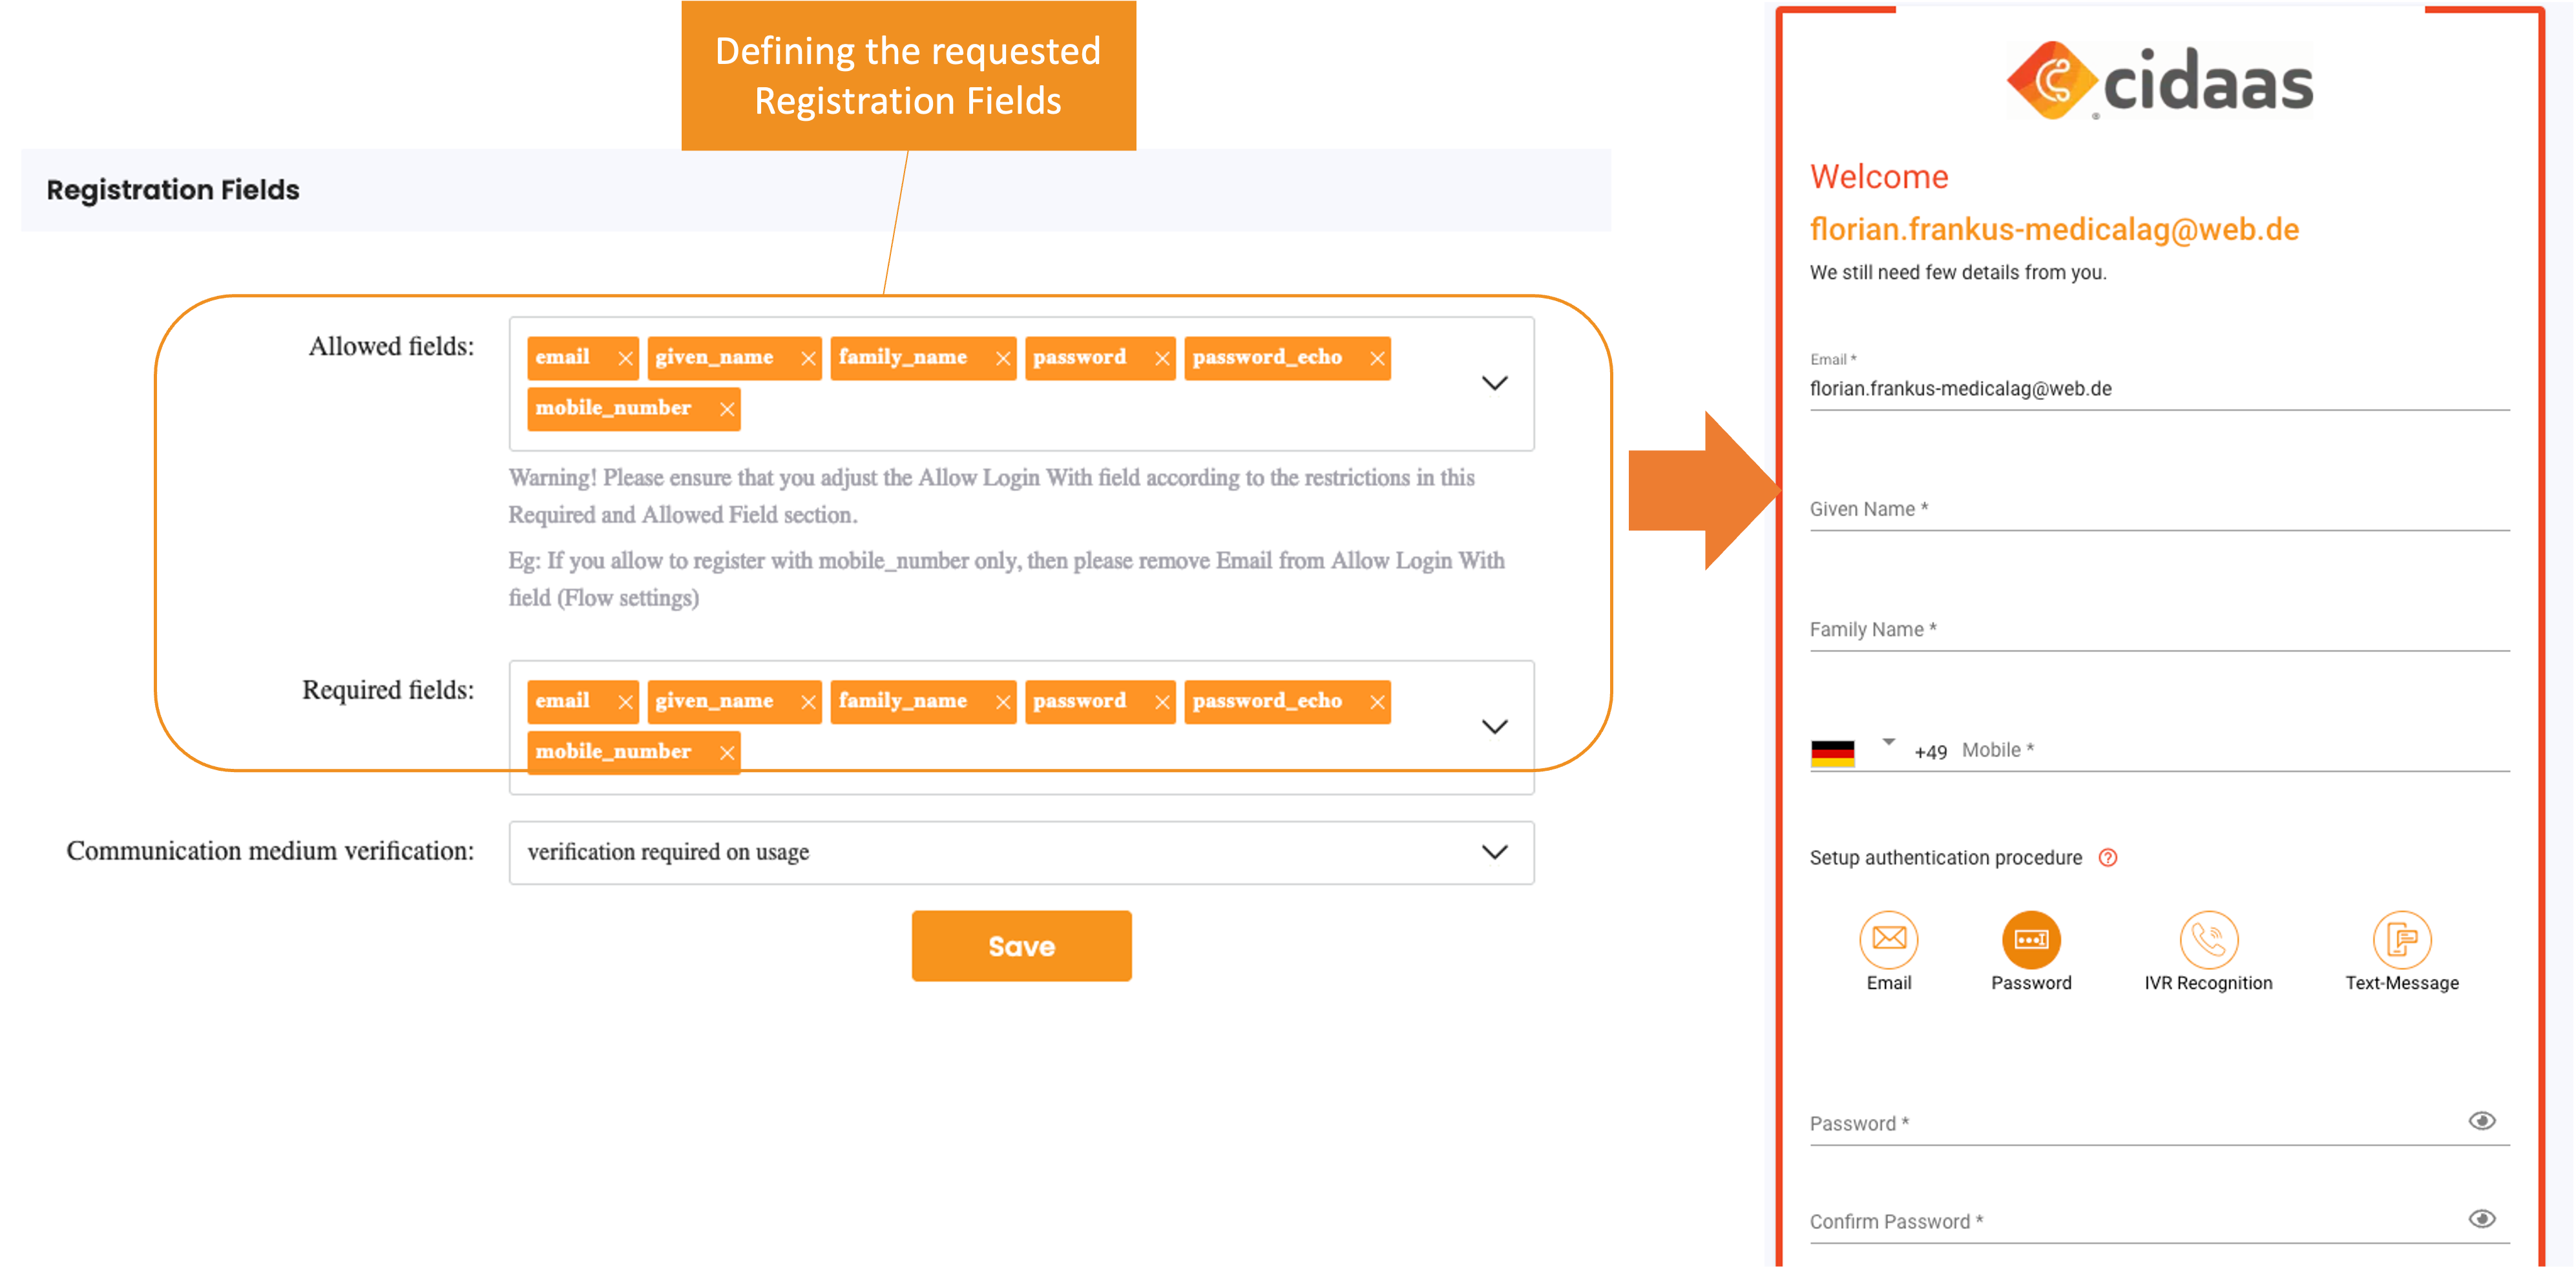 |
Understanding the Flow and APIs
| API | Description | Link |
|---|---|---|
| GET Pre-Login Metadata | This API will provide you the information which user interaction is required to complete e.g. which fields are missing. | Link to API |
| POST Progressive User Information | This API allows to add further information to the user profile, when prompted to missing_required_fields | Link to API |
| POST Continue Login | To continue the Login so that a code or token is issued, the continue API call will proceed | Link to API |
Step 1: Redirection to register_additional_info
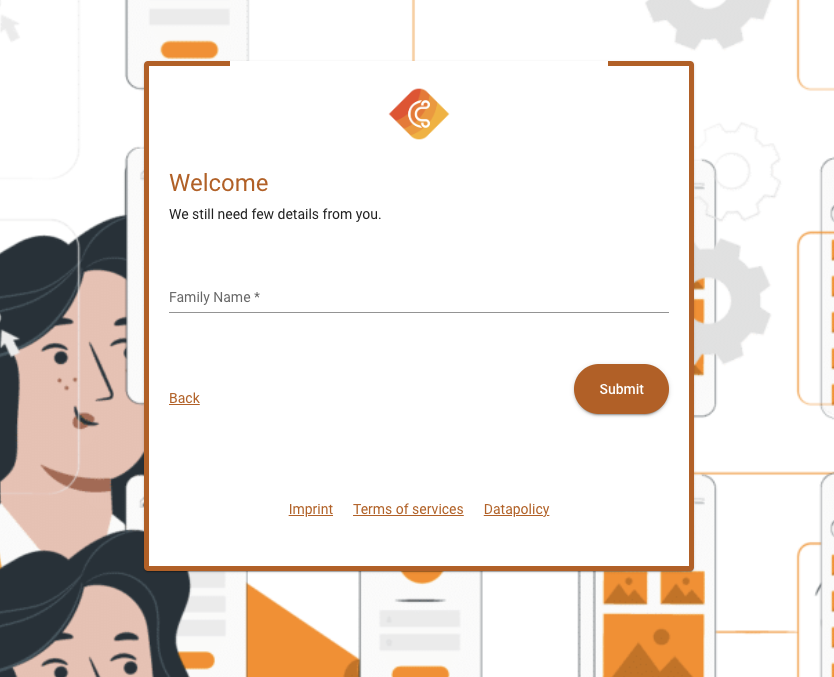
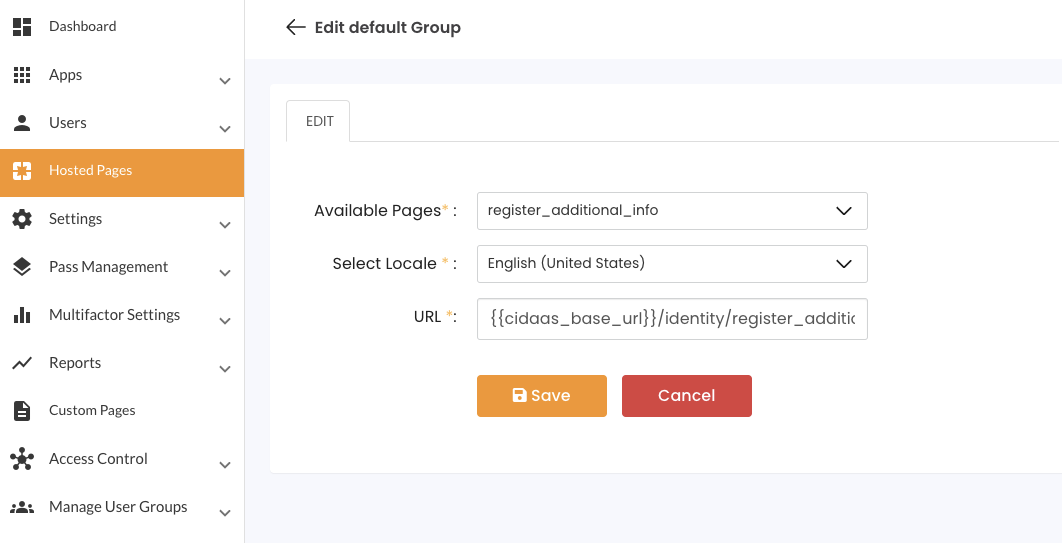
After login, if any required fields are missing, the user is redirected to the page defined by the hosted page key: register_additional_info (by default, /identity/register_additional_info), passing the track_id as a query parameter.
curl 'https://demo.cidaas.de/identity/register_additional_info?track_id=a767d2c0-f029-41ad-92c1-2f7e59bd8f74&trackId=a767d2c0-f029-41ad-92c1-2f7e59bd8f74&requestId=5a7392bb-285f-4b56-8752-eda7d0a42e2f&view_type=login' \
  --compressed
Step 2: Retrieve the Missing Fields Metadata
Call the Pre-Login Metadata API with the track_id to identify which required fields are missing from the user's profile.
curl 'https://demo.cidaas.de/token-srv/prelogin/metadata/a767d2c0-f029-41ad-92c1-2f7e59bd8f74?acceptLanguage=en-US' \
  --compressed
Example Response:
{
  "success": true,
  "status": 200,
  "data": {
    "validation_type": "missing_required_fields",
    "meta_data": {
      "missing_fields": [
        "family_name"
      ]
    }
  }
}
Step 3: Provide the Missing User Information
Render the missing fields in the UI. When the user submits the form, send the updated fields to the Progressive Profiling update endpoint.
curl --location --request POST 'https://demo.cidaas.de/login-srv/progressive/update/user' \
--header 'trackID: a767d2c0-f029-41ad-92c1-2f7e59bd8f74' \
--header 'Content-Type: application/json' \
--data-raw '{
   "family_name": "Doe"
}'
Step 4: Continue the Login Process
Once the fields have been updated successfully, call the continue API to complete the login/authentication process and obtain the authorization code or tokens.
curl --location --request POST 'https://demo.cidaas.de/login-srv/precheck/continue/a767d2c0-f029-41ad-92c1-2f7e59bd8f74' \
  --compressed
If any other pre-checks are required (e.g., MFA or consents), this API will return the appropriate next action/redirect. If all criteria are met, it redirects the user back to the application with the authorization code/token.
Handling Requests for Custom & Social Pre-registration
In this scenario, even if the social registration is successful, you might encounter a situation where the user information from the login provider is incomplete or missing required details.
Step 1: Getting tracking ID after Registration
If you get the tracking id after registration when you make a prelogin request, you need to make the following API call.
curl 'https://demo.cidaas.de/token-srv/prelogin/metadata/{trackingid}' --data 'trackId=aab8b099-ce12-4ecf-bf27-39eeb5c63fbd' --compressed
| API | Description | Link |
|---|---|---|
| Precheck Information | This API allows you to verify which precheck was failing and e.g. when prompted to missing_required_fields, which fields are missing | Link to API |
Step 2: Getting the Social Login Registration Details
To get the registration details when you do a prelogin request (after a social login attempt), you need to make the following API call at the /trackinfo endpoint.
curl 'https://demo.cidaas.de/public-srv/public/trackinfo/{requestid}/{trackid}' --data 'trackId=aab8b099-ce12-4ecf-bf27-39eeb5c63fbd' --compressed
Step 3: Getting tracking ID before registration
If you get the tracking id before registration when you make a prelogin request (after the login request), you need to make the following API call.
curl '{{baseurl}}/useractions-srv/registration'
| API | Description | Link |
|---|---|---|
| Register User | This API registers a user in cidaas | Link to API |
Implementation using SDKs
This Implementation Guide is based on the default hosted pages which uses an Angular framework based on Typescript. It can be implemented in any other programming language as well.
As a first step you will be redirected to the register_additional_info page. This section starts to show the APIs to be called when reaching this page:
To install the cidaas-sdk please perform the following command
npm install cidaas-javascript-sdk
The import to your webapp will be done using:
this.cidaas_sdk = new WebAuth(options)
Step 1: Retrieving the Missing Fields using Token Prelogin Metadata
const resp = await this.cidaas_sdk.getMissingFieldsLogin(this.route.snapshot.queryParams['track_id']);
Using the response of this API call, you can render the UI as displayed above. It will present the scope key as well as you can present the values that can be requested during the userinfo or even provided in the id_token.
Step 2: Rendering the UI
To be able to render the fields properly in the UI, you want to request all localized fields, with all respective data like maxLength, and error messages displayed when this field is not filled.
    let options = {
      acceptlanguage: this.queryParams.ui_locales? this.queryParams.ui_locales : navigator.language,
      requestId: this.route.snapshot.queryParams['requestId'],
    };
    const resp = await  this._cidaasSDK
      ._getRegistrationSetup(options);
Step 3: Providing the respective user information
To finally proceed with the authentication process and be able to use your service, the user must click on the accept button. The final call will accept the scope consent by providing all scope keys which you received from above request to the below request body (scopeArray).
    let payload: any = {};
    Object.keys(this.missingfieldsValues).map((key) => {
      if (this.missingfieldsValues[key]) {
        payload[key] = this.missingfieldsValues[key];
      }
    });
    const resp = await this.cidaas_sdk.progressiveRegistration(payload);
Step 4: Continue the login Process
The scopeConsentContinue will continue the login process and finally the user will be redirected to the provided redirect_uri.
    const resp = await this.cidaas_sdk.mfaContinue({
      sub: this.route.snapshot.queryParams['sub'],
      client_id: this.route.snapshot.queryParams['client_id'],
      track_id: this.route.snapshot.queryParams['track_id'],
    });
Please contact us on our Developer Support Page.