cidaas for WordPress
cidaas provides a plugin that is deployed in the WordPress marketplace and can be configured and used by WordPress users.
This article will help you integrate cidaas plugin into your WordPress application.
Install the WorldPress.
In a nutshell these are the steps:
- Create a cidaas app
- Activating the cidaas plugin
- Configure cidaas endpoints.
- Create login page and configure
- Verify your configuration
Create an cidaas app
Creating an app will help you get a unique app for WorldPress with its Client ID and Client secret.
Activating cidaas plugin
This section will help you configure cidaas as a login to your worldPress application so that you can use all the cidaas login functionalities and authentication methods for user management.
-
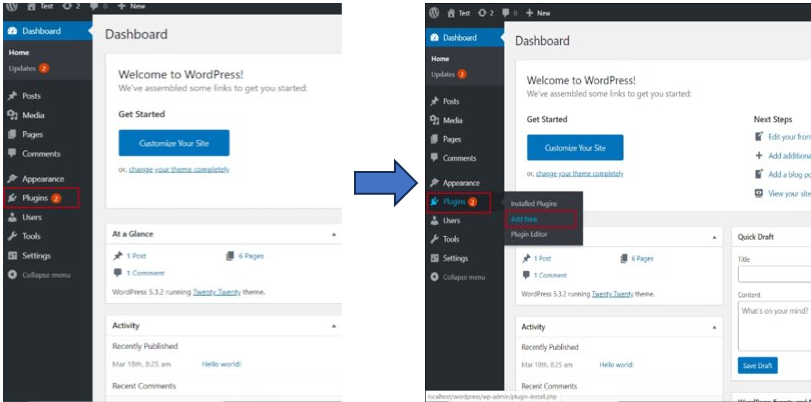
Login to your WordPress admin panel.
-
Select the Plugins menu and click on Add new.
-
Search for Login using cidaas in the search bar and click on Install Now.
-
Click on Activate.
Configure cidaas endpoints
The next step is to integrate cidaas endpoints so that Login with cidaas plugins is configured.
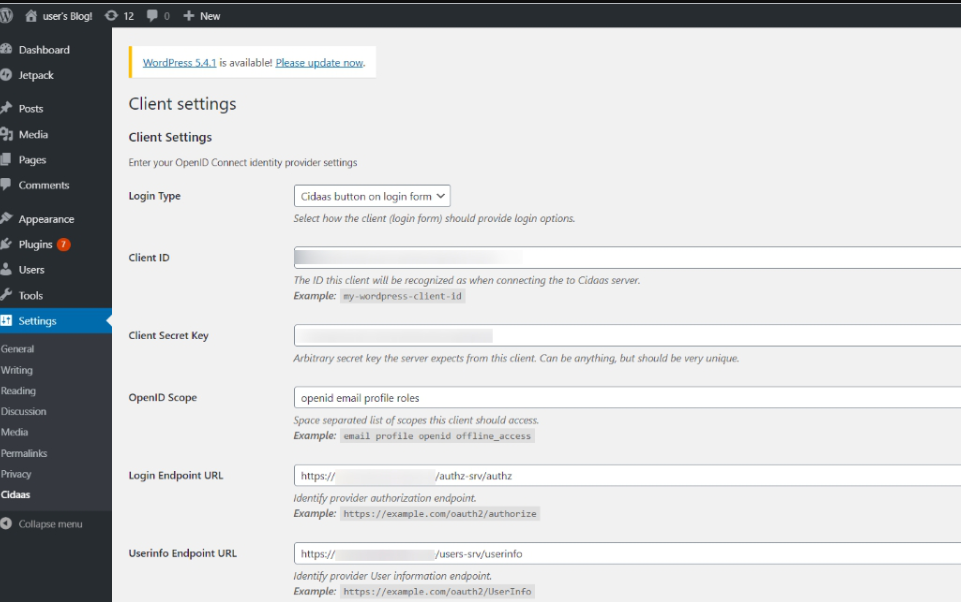
- Select Settings and click on cidaas.
- Enter the following fields.
Copy the redirect URI and login button short code before saving.
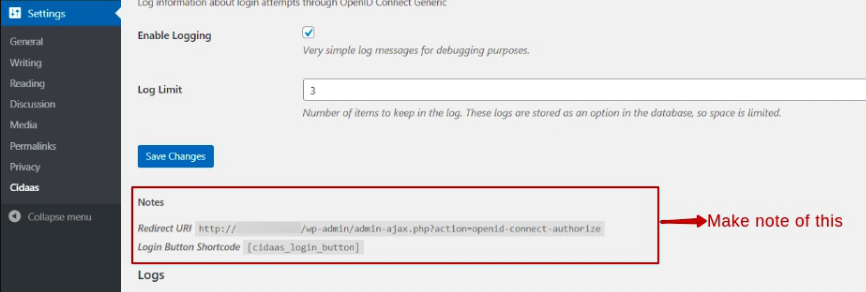
- Click on Save.
Create Login Page and configure
Now you need to create a login page to show the Login with cidaas button on it.
Then we can link this newly created login page to your WordPress top menu bar for quick access.
-
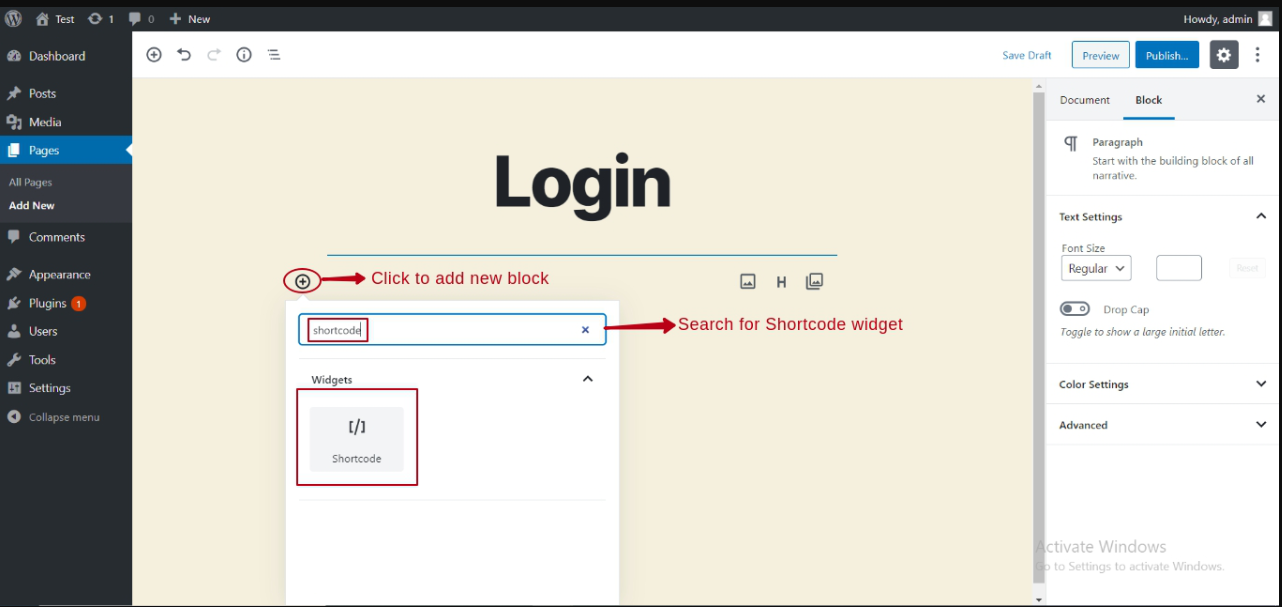
Select the Pages menu on the sidebar and click on Add New.
-
Provide the suitable title and paste the login shortcut saved from the previous section on your page.
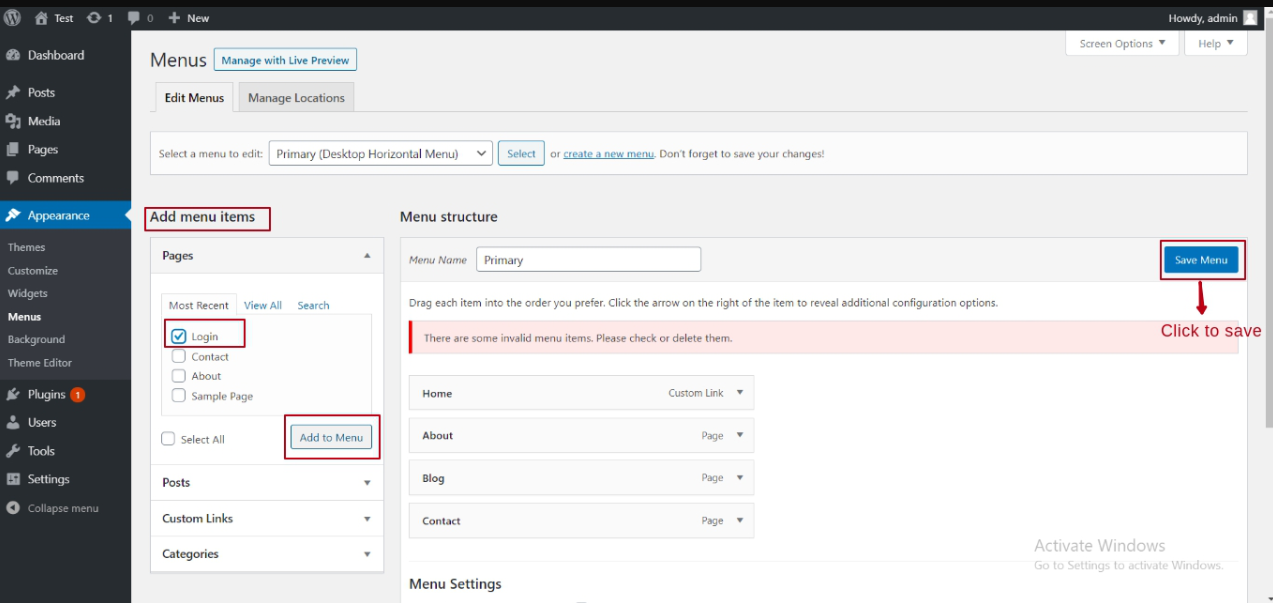
Adding Page to the menu (configure)
These steps will help you link your newly created page in the top menu of your WordPress interface.
-
Select the Appearance menu on the sidebar and click on Menus.
-
Under the Add menu items section, select the recently created login page and click on the Add to Menu button.
-
Click on Save Menu .
Verifying your Configuration
- Run your WordPress application.
- Click on Login menu.
- Click on Login with cidaas button.
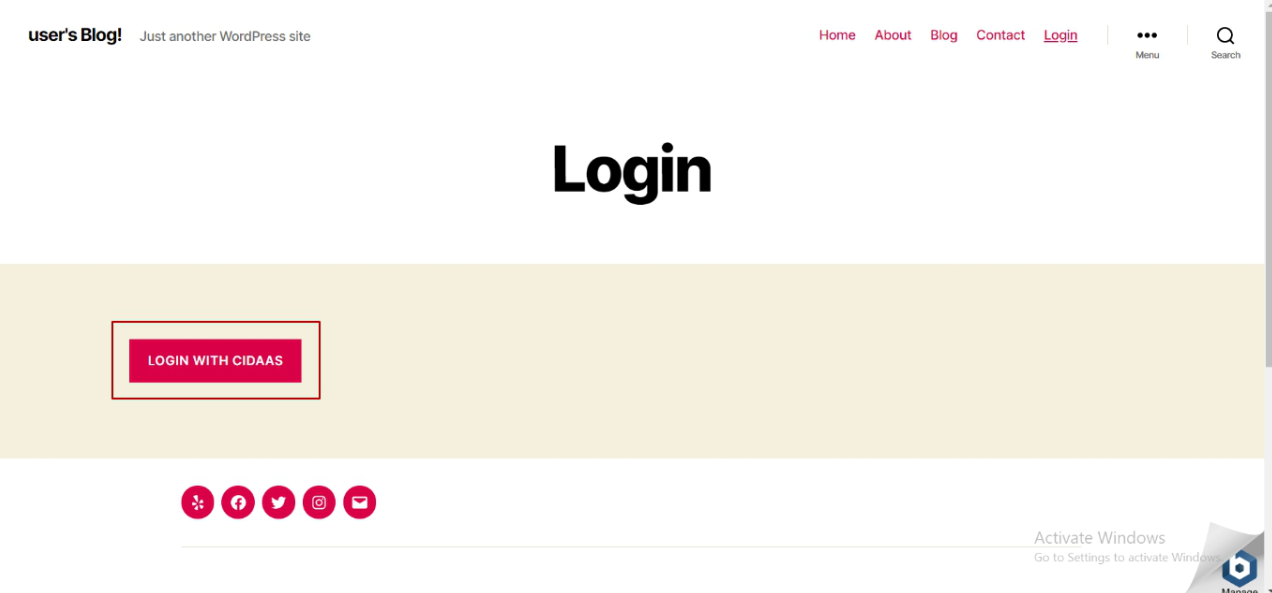
- You will now be redirected to the cidaas login page, and you can perform the authentication with the help of cidaas.
Please contact us directly on our support page or reach out to cidaas support at [email protected].