cidaas for Typo3
cidaas provides an extension that is deployed in the Typo3 marketplace and can be configured and used by Typo3 users.
This article will help you integrate the cidaas extension for Typo3.
Install the Typo3.
In a nutshell, these are the steps:
- Create a cidaas app
- Activating the cidaas plugin
- Include cidaas templates
- Create a login page and user page (if not already present).
- Add the cidaas plugin to the login page
- Configure the cidaas extension
- Verify your configuration
Create a cidaas app
Creating an app will help you get a unique app for Typo3 with its Client ID and Client secret.
Activating the cidaas plugin
This section will help you configure cidaas as a login to your Typo3 application so that you can use all the cidaas login functionalities and authentication methods for user management.
-
Login to your Typo3 admin panel.
-
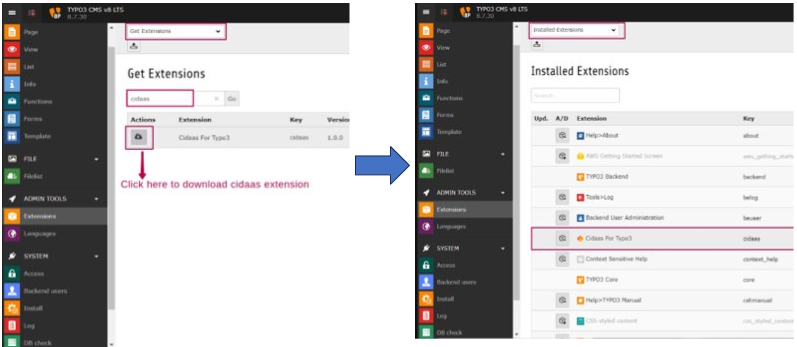
Select Extensions from the left menu. Choose Get Extensions from the dropdown.
- Search for the cidaas extension and download it.
-
Choose Installed Extensions from the dropdown. Check for cidaas for Typo3.
Include cidaas templates
This section will help you include the required templates for cidaas for the Typo3 extension.
-
Login to your Typo3 admin panel.
-
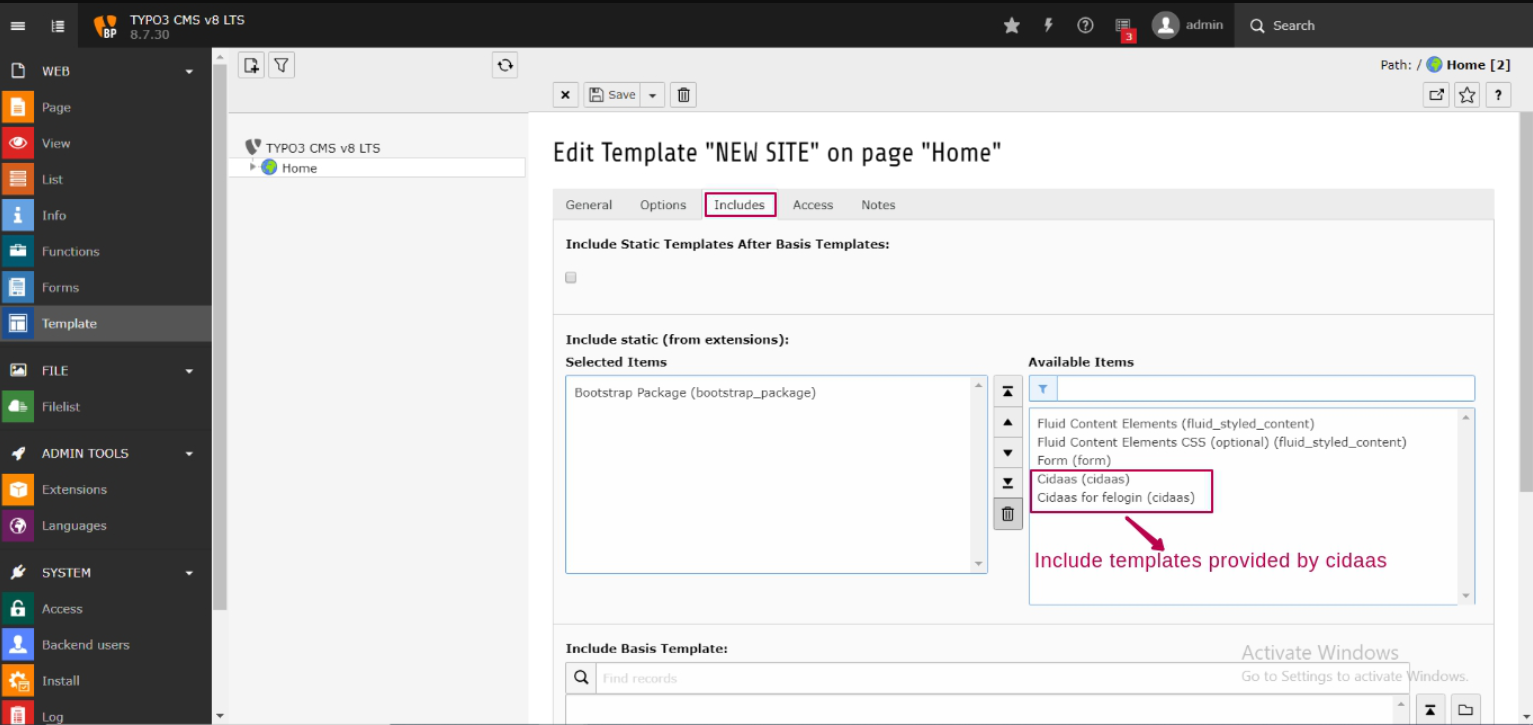
Select the Templates section in the left menu and click on the Edit the Whole Record.
-
Select the Includes tab. Choose the templates provided by cidaas, i.e cidaas(cidaas) and cidaas for felogin(cidaas) by searching them in Available items.
Create a login page and user page
Create login page
-
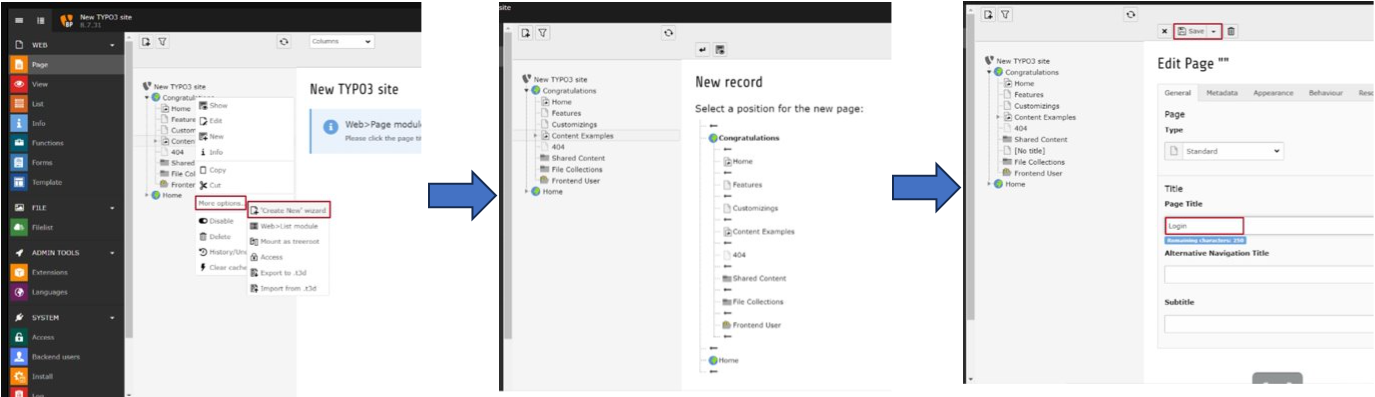
Navigate to root page of your typo3 project and right click > More options > Create new wizard.
-
Select the position where the page needs to be created.
-
Give it a suitable title and click on Save.
Create user page
- Follow the step 1 and step 2 of Create login page.
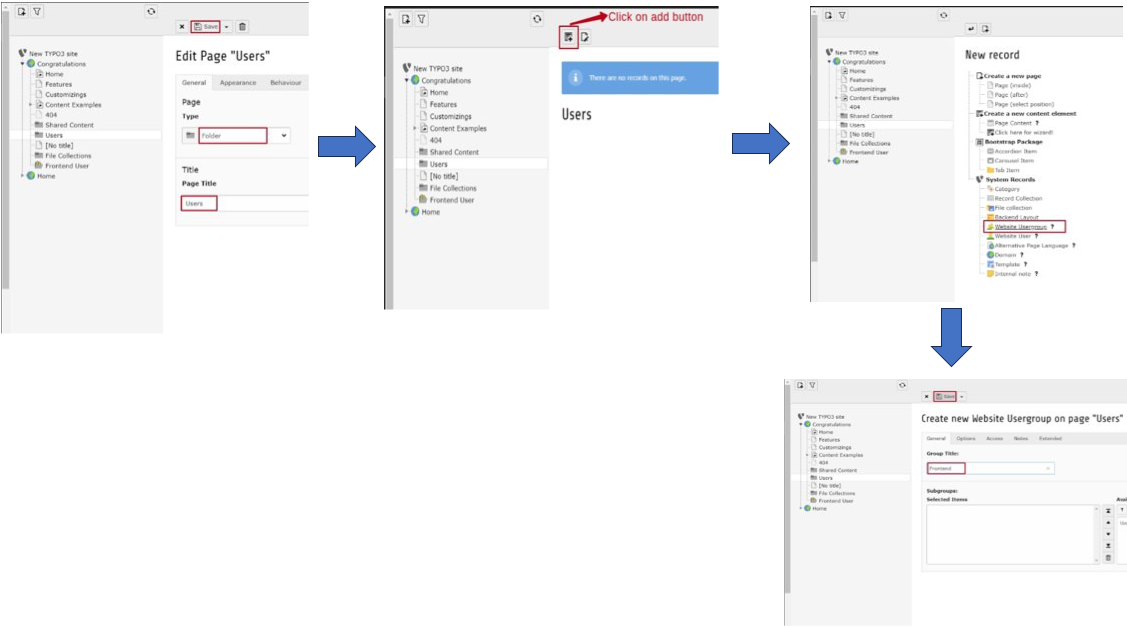
- Select page Type as Folder, enter title as Users and click on Save.
- Now click on the newly created Users folder > Add button.
- Select Website Usergroup> Enter a suitable name > Save .
Add the cidaas plugin to the login page
In this section, we will guide you through configuring the cidaas plugin as a content on your login page.
-
Navigate to the Home page and select Page. Go to your login page to add select content and click on Add content.
-
Under the Plugins tab > General Plugin.
-
Select cidaas Login option from the selected Plugin dropdown, available under the Plugin tab and then select the storage location and save.

Configure the cidaas extension
Now we will configure cidaas for Typo3 extension with your client id and client secret, which are obtained from your cidaas application.
-
Navigate to the Home page and select Extensions. Choose cidaas for Typo3 > Configure.
-
Fill all the required details, such as client id, client secret, and scopes under basic, related endpoints under Advanced, and Save.

We are now done with the setup, and you can verify your configuration.
Verifying your configuration
-
Run your Typo3 application.
-
Click on the Login button.
-
You will now be redirected to the cidaas login page, and you can perform the authentication with the help of cidaas.
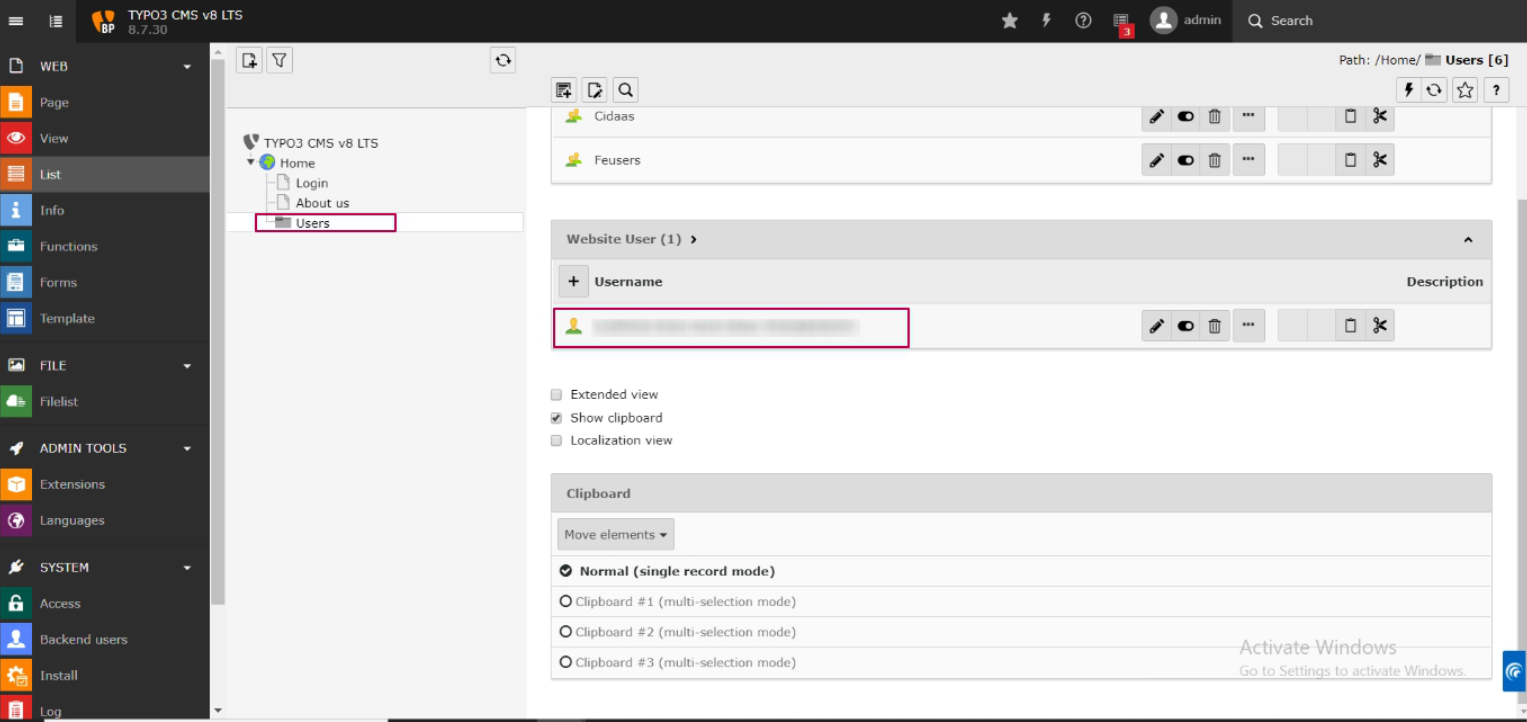
- After successful login, Navigate to your Typo3 > List > Users page,where you will find the Website user section, which contains the details of the logged-in user.
Please contact us directly on our support page or reach out to cidaas support at [email protected].