Verification Enrollment
Passwordless authentication of cidaas (Touch ID, Face Recognition, etc.) will help you seamlessly log in to your desired application without worrying about the authenticity of the actor, which will in turn save you time with our quick, secure, and dependable service.
In this section, we will tell you about passwordless authentication (MFA) with their:
- technical integration
- end-users enrollment process
Technical Integration
| API | Description | Link |
|---|---|---|
| Enrollment Initiation | The enrollment of a user via authenticator app will provide the URL that is shown e.g as a QR Code in the default user profile. | Link to API |
| Enrollment Status | This will allow to verify the enrollment status in the User Profile, to determine when to continue the enrollment completion. | Link to API |
| Enrollment Completion | After successfully authenticating via e.g. the authenticator app, the enrollment completion will finally enroll the user. | Link to API |
| Add friendly Device Name | In case of using device authentication methods like FIDO2, you can add a user-friendly name. | Link to API |
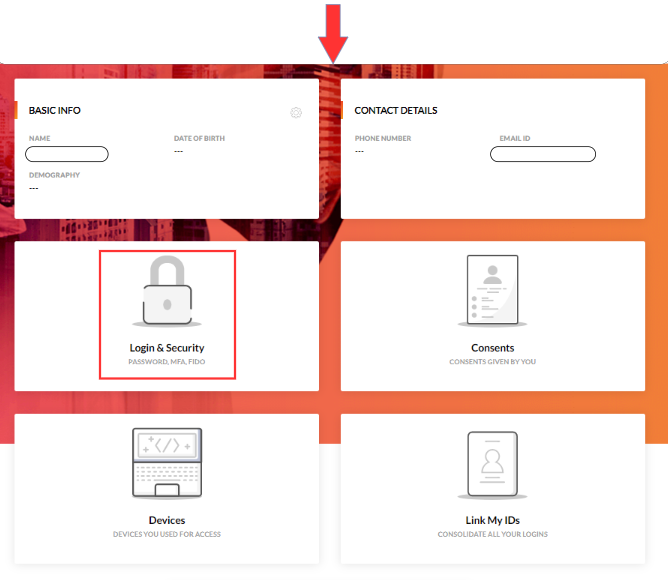
Enrollment in the Default User Profile
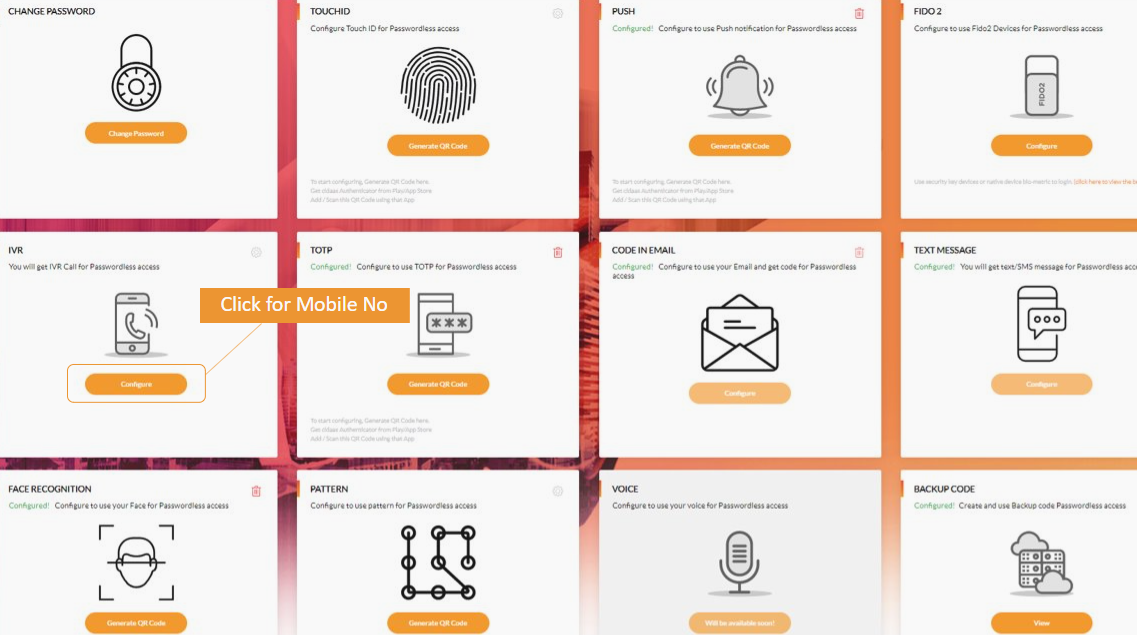
Configuring the MFA is pretty easy, and these configurations can be done using the following methods.
- Configure by QR code.
- Configure by mobile number.
This depends upon the MFA you are configuring.
Note: For Backup code and FIDO these methods do not apply; we have explained those in a different section.
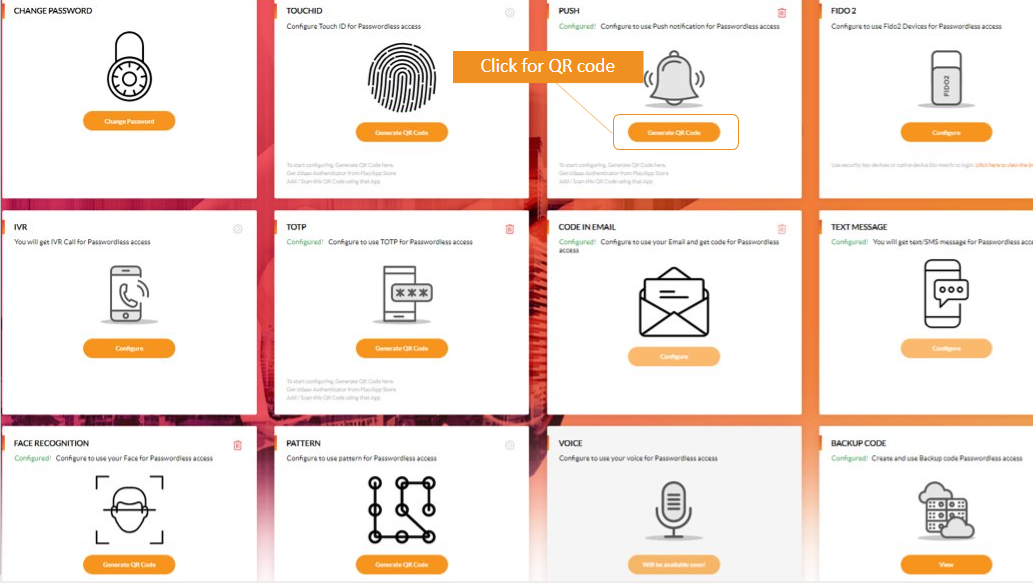
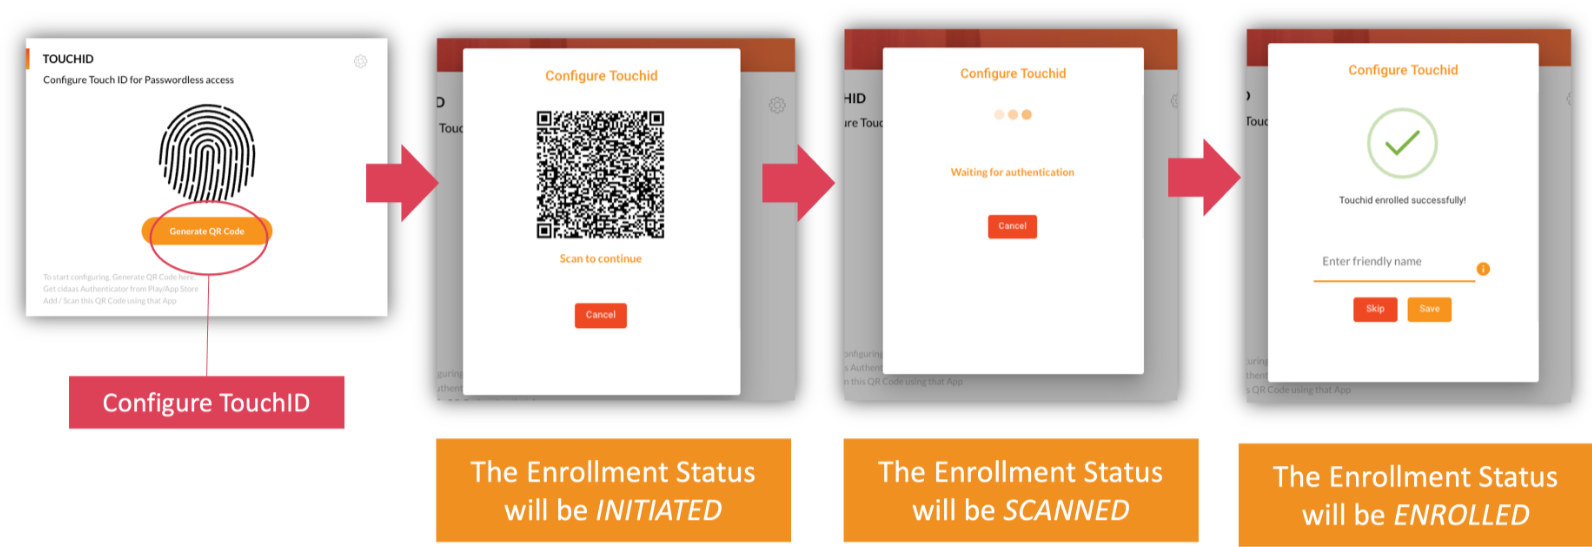
Configure by QR-code
In this method, you just need to scan the QR code and follow the instructions displayed on your phone. This method is used for the following MFAs:
- Touch ID
- Face recognition
- Pattern
- TOTP
- Push
Navigate to the desired MFA
On the user profile dashboard,
-
Go to Login & Security.
-
Scroll down to MFA, and click on Generate QR-code.
A unique QR code is generated to assist you in configuring MFA on your mobile device.
Here two APIs will be used one for initiation and one is for the status.
API Description Link Enrollment Initiation The Enrollment of a user via authenticator app, will provide the URL that is shown e.g as a QR Code in the default user profile Link to API Retrieve the Authentication Enrollment Status in the User Profile
API Description Link Enrollment Status This will allow you to verify the enrollment status in the User Profile, to determine when to continue the enrollment completion Link to API
Scan the QR code
-
Open your phone's cidaas app and select Scan QR Code.
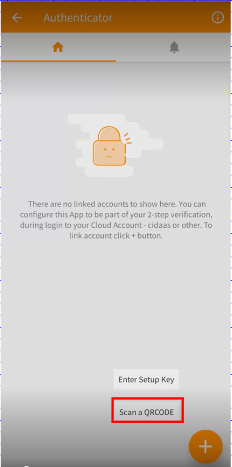
-
Click on SCAN, and scan the unique QR-code on the cidaas website.
Integrate the Authentication Method
Follow the instructions given on the phone to initiate the authentication.
This can vary depending on the enrollment method.
Add a User-Friendly Name
After configuring some of the authentications, such as pattern, push, face recognition, and Touch ID, they need a friendly name to avoid confusion if two people are using the same account on different devices.
| API | Description | Link |
|---|---|---|
| Add Device Name | In case of using device authentication methods like FIDO2, you can add a user-friendly name | Link to API |
The whole flow is as shown below.
You generate the QR code , scan it using the authenticator app, and give a friendly name it.
Configure by Mobile Number
In this method, you just need to enter the mobile number and follow the instructions displayed on the phone. This method is used for the following MFAs, which include
- IVR
- Text message
Note : Email and text message MFA's are by default configured if you have registered using a mobile number and email.
Navigate to the desired MFA
On the user profile dashboard,
-
Go to Login & Security.
-
Scroll down to MFA, and click on Configure.
Enter the Verification code
-
Enter the mobile number.
A unique verification code is sent via phone call, text message, or email (depending on the MFA you're configuring) to your mobile number or email.
-
Enter the verification code.
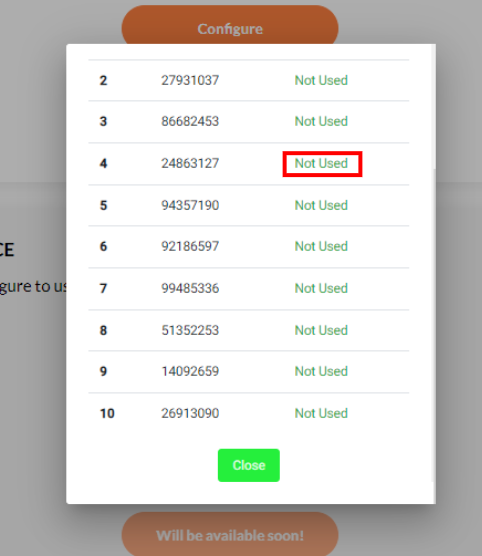
Configuring Backup Code
In this method you just need to
-
Navigate to Backup Code.
-
Click configure, you will get the codes displayed as shown below.
-
Note down the codes.
Configuring FIDO
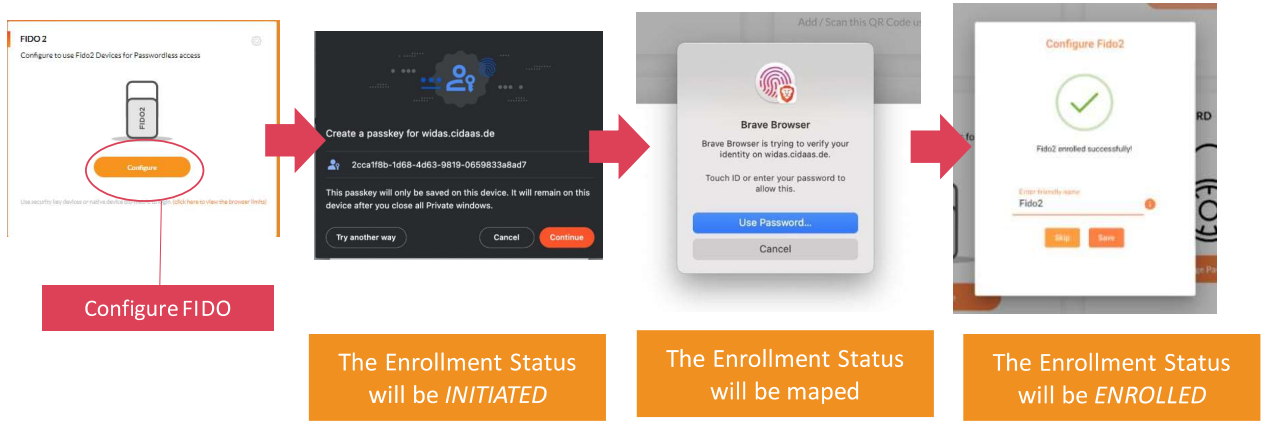
In this method you just need to:
- Navigate to FIDO.
- Click on the configure, you will get a popup of the private key.
- Accept the key, you will get a popup message to place your finger on the fingerprint sensor.
- Add a friendly name to the FIDO.
| API | Description | Link |
|---|---|---|
| Enrollment Initiation | The Enrollment of a user via authenticator app, will provide the URL that is shown e.g as a QR Code in the default user profile | Link to API |
| Enrollment Status | This will allow to verify the enrollment status in the User Profile, to determine when to continue the enrollment completion | Link to API |
| Add Device Name | When using device authentication methods like FIDO2, you can add a user-friendly name | Link to API |
Configuration Success
To confirm that you have successfully configured the MFAs, you can find the configured MFAs on the home screen of your cidaas mobile app as well as on the cidaas website.
Please contact us directly on our support page or reach out to cidaas support at [email protected].