How do I setup the registration fields for a specific client?
To setup optional or mandatory registration fields you have to go to the respective App in Admin-UI and navigate to Advanced Settings > Registration Fields.
Configuration options
You can add any default or custom registration field either as a mandatory or optional field. To select a mandatory field you have to add the field to the required fields first.

Create Custom registration fields
To add new registration fields, go to Settings -> Registration Fields. Here you can add new fields by clicking the plus-symbol. You can organize your fields by creating field groups beforehand.
To create custom fields:
-
From the registration setup screen, right-hand side top corner click “Create Field” button.
-
Enter the field key which is the name used internally.
-
Select the appropriate field type from the drop down.
-
Select the appropriate scopes from the drop down
For e.g., first name, last name and email could each be mapped with the “profile” scope. Date of birth is a field that can be mapped to the “profile” scope as well as “personal” scope. So, when an application request contains the “profile” scope, only such data from the fields that have the same scope associated with them, will be allowed access.
Access restrictions can therefore be implemented on a set of fields, by grouping them based on scope.
- Select the appropriate checkbox against enable/required/read only/internal/unique. If the enable checkbox is not selected, then user is not able to see the activity in the registration page. For required fields you can specify an error message if users try to register without filling that field.
-
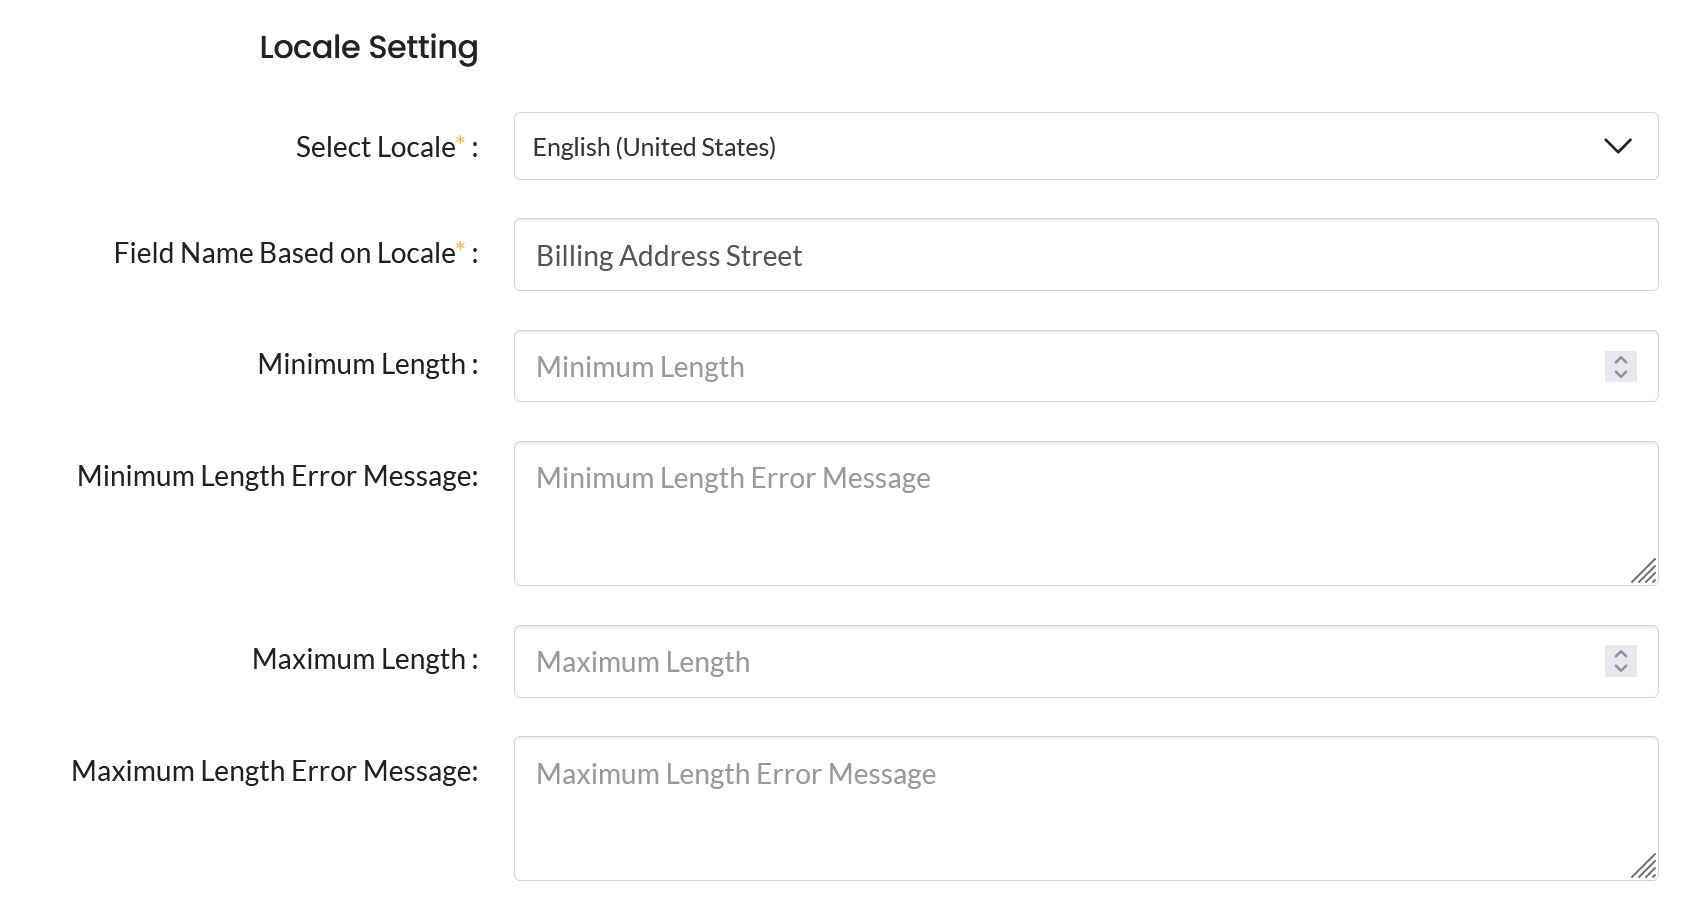
Under locale settings, select the appropriate locale and enter field name based on locale.
-
Optional: Specify the minimum and maximum length of inputs and the corresponding error messages if the expected length is not met.
-
Click “Save” button and confirm success message.
-
Once the fields are created and used in an app, they are available during the registration form/signup to cidaas.
Please contact us directly on our support page or reach out to cidaas support at [email protected].